
35 Polka Dot Nails That Feel Cute and Playful
Choosing a playful manicure sounds easy until you start comparing colors, dot sizes, base shades, and nail shapes. Some polka dot designs can feel too busy, while others barely show up once the polish dries. You may also want something cheerful without making your nails look childish or difficult to match with your clothes.
These 35 polka dot nails that feel cute and playful offer plenty of wearable inspiration. You will find soft pastel dots, bold color combinations, tiny minimalist patterns, French tips, seasonal ideas, and designs that work on short or long nails.
Most of these looks can be recreated with a dotting tool, a bobby pin, or the rounded end of a makeup brush. Each idea includes practical color advice, a useful application tip, one mistake to avoid, and a realistic DIY or salon price range. You can cover every nail with dots or keep the pattern on one or two accent fingers. The best design is the one that fits your style, schedule, and comfort level.
1. Classic Black Dots on a Sheer Nude Base
Black dots over a sheer nude base create a clean manicure with a playful edge. The transparent polish lets your natural nails show through, while the dark dots add clear contrast. This design works beautifully with short rounded nails, almond shapes, and longer square tips.
Apply one or two coats of milky nude polish. Once dry, use a small dotting tool to place evenly spaced black dots across each nail. Keep the dots small if you want a softer finish. In my experience, the biggest mistake here is adding the dots before the base has dried, which causes the colors to bleed together. Allow extra drying time between layers. A DIY version usually costs $10 to $25. A salon gel manicure with simple dot art may cost $40 to $65.
2. Red and White Retro Polka Dots
Bright red nails with crisp white dots have a cheerful retro feel. The glossy finish brings to mind vintage dresses, cherry prints, and classic summer accessories. The contrast is bold, but the simple pattern keeps the design easy to understand.
Paint each nail with two thin coats of cherry red polish. Add white dots with a medium dotting tool, leaving even space between them. For a calmer version, use the pattern on two accent nails and keep the others solid red. Avoid making the dots too large because they may overlap on short nails. What I personally love about this is how well it works on almost every nail shape. DIY materials cost around $10 to $25. A salon version generally ranges from $40 to $70.
3. Pastel Rainbow Dot Manicure
A pastel rainbow manicure feels light, cheerful, and easy to wear. Small dots in lavender, peach, mint, pale yellow, and baby blue sit over a soft cream or nude base. The colors look playful without becoming too bright.
Begin with a pale neutral base. Place dots in different pastel shades, changing the position slightly on each nail. Keep the dots similar in size so the design still looks connected. A lot of people skip this step, but wiping the dotting tool between colors prevents muddy shades. Avoid placing too many dots close together, especially on shorter nails. A pastel polish set and dotting tool may cost $15 to $40. Salon pricing usually falls between $45 and $75.
4. Polka Dot Nails With Tiny French Tips
Tiny dots paired with slim French tips create a sweet but polished manicure. A sheer pink base keeps the look airy, while the dots add personality below the curved tips. You can use white for a classic finish or choose brown, red, or pastel colors.
Apply a sheer base, then paint a thin French tip on each nail. Add two or three tiny dots near the cuticle or along one side. Keep the placement consistent across both hands. Avoid using thick French tips because they can compete with the dot pattern. I always recommend this when someone wants playful nail art without covering the whole nail. DIY supplies may cost $12 to $30. A salon French manicure with dot art often costs $50 to $80.
5. Chocolate Brown and Cream Dots
Chocolate brown and cream create a warm polka dot manicure that feels cozy and wearable. The deep brown base resembles polished wood, while the cream dots soften the overall design. It pairs beautifully with beige knitwear, denim, and gold jewelry.
Paint most nails chocolate brown and use cream dots on top. Reverse the colors on one or two accent nails for balance. Use two thin coats of base color so the surface stays smooth. Avoid adding cream polish while the brown layer is still soft, since the dots can sink or spread. A DIY manicure costs about $10 to $30. A salon gel version may range from $40 to $70.
6. Pink Polka Dot Nails That Feel Playful
Soft pink nails covered with deeper rose dots create a sweet monochrome look. Using two shades from the same color family keeps the manicure coordinated, while the pattern adds enough contrast to remain visible.
Choose a pale blush base and a raspberry or dusty rose shade for the dots. Place the dots in straight rows for a neat finish or scatter them for a more relaxed look. What I personally love about this is how easy it is to adjust the contrast. Avoid choosing two shades that are too similar, or the dots may disappear in indoor light. A DIY set costs around $10 to $25. Salon prices usually range from $40 to $65.
7. Navy Blue With White Mini Dots
Navy blue polish creates a rich backdrop for tiny white dots. The finished manicure feels crisp and graphic, yet softer than a black and white combination. It works well throughout the year and pairs easily with denim, cream, gray, and red clothing.
Apply two thin coats of navy polish. Use the smallest dotting tool you have to create fine white dots across each nail. Keep the spacing open so the dark base remains visible. Avoid pressing too firmly because the tool can create uneven circles. A lot of people skip this step, but testing the dot size on paper first saves time. DIY materials may cost $10 to $25. Salon pricing is usually $40 to $70.
8. Dotted Cuticle Crescent Design
A dotted cuticle crescent places the pattern only along the base of each nail. The open space keeps the manicure clean, while the curved row of dots follows the natural shape of the cuticle. It looks especially pretty on almond and oval nails.
Apply a sheer nude or soft beige base. Add three to five small dots in a curved line near each cuticle. Use gold, white, black, or pastel shades depending on the mood you want. Avoid placing polish directly against the skin because the design may look messy as the nails grow. Leave a small, even gap. A DIY version costs about $8 to $25. Salon nail art may range from $40 to $70.
9. Cherry Red Dots on Pale Pink
Cherry red dots over a pale pink base feel bright, charming, and easy to style. The colors create a softer alternative to solid red nails while still giving the manicure a noticeable pop.
Paint the nails with a light blush shade, then add small cherry red dots. Leave one or two nails solid pink if you want less pattern. In my experience, the biggest mistake here is placing too many dots near the edges, where they can look cut off. Start near the center and work outward. A DIY manicure may cost $10 to $25. A salon set usually costs $40 to $65.
10. Mint Green and White Dots
Mint green nails with white dots feel fresh and light. The cool base keeps the design soft, while crisp white circles add a clear pattern. It works especially well on short nails because the colors do not make the shape feel heavy.
Apply two thin coats of mint polish. Add small white dots in alternating rows, allowing the green to remain visible between them. Avoid choosing a chalky mint formula that applies unevenly. A smoothing base coat can help pale polish look cleaner. DIY supplies usually cost $10 to $30. Salon pricing may range from $40 to $65.
11. Mixed Dot Sizes on a Neutral Base
Combining large and small dots creates a more artistic pattern than evenly sized circles. A beige or sheer base keeps the look balanced, while black, brown, or colored dots create movement across each nail.
Start with the largest dots, then fill open areas with smaller ones. Keep some empty space so the design does not become crowded. A lot of people skip this step, but using two separate dotting tools makes the size difference much clearer. Avoid placing large dots too close to the nail edges. A home dotting set and polish may cost $12 to $30. Salon prices often range from $45 to $75.
12. Lavender Dots With a Glossy Lilac Base
Lilac polish with slightly darker lavender dots creates a soft layered manicure. The monochrome colors feel gentle and calming, while the glossy finish helps the pattern catch the light.
Use a pale lilac base and a medium purple for the dots. Place the dots in a loose scattered pattern rather than strict rows. Avoid using an opaque dot color that sits too thickly above the base. Thin polish creates smoother circles. What I personally love about this look is how well it works with silver jewelry and cool-toned clothing. DIY supplies cost around $10 to $25. Salon pricing may range from $40 to $65.
13. Polka Dot Accent Nails With Solid Color
Using polka dots on only one or two accent nails gives you a playful detail without covering the whole manicure. Solid surrounding nails help the dotted pattern stand out and make the set easier to match with everyday outfits.
Choose one main color, then reverse it on the accent nails. For example, paint most nails pink and use a white base with pink dots on the ring fingers. Avoid adding several unrelated colors because the design can lose its clean look. I always recommend repeating the main polish shade inside the dots so the set feels connected. A DIY version costs around $10 to $25. Salon gel may range from $40 to $70.
14. Peach Nails With Coral Dots
Peach and coral create a warm, cheerful combination. The pale base has a creamy finish, while the brighter dots add energy without becoming too intense. It is an easy choice for spring, summer, or vacations.
Apply a smooth peach base and allow it to dry fully. Add medium coral dots with even spacing. Keep the design glossy for a juicy color effect. Avoid applying thick peach coats because pale shades often streak when overloaded. Three very thin coats may look cleaner than two heavy ones. DIY materials cost around $10 to $30. A salon manicure may cost $40 to $65.
15. Black and White Reverse Dot Nails
Reverse dot nails alternate the base and pattern colors from one finger to the next. Some nails are black with white dots, while others are white with black dots. The result feels graphic, bold, and playful.
Apply the base shades first and make sure the white polish is fully opaque. Add dots in the opposite color using the same tool for consistent sizing. Avoid applying black polish with a stained dotting tool over white nails. Clean the tool carefully between colors. In my experience, this small step prevents gray, muddy circles. DIY supplies may cost $12 to $30. A salon version usually ranges from $45 to $75.
16. Daisy and Polka Dot Combination
Tiny daisies mixed with simple dots create a cheerful garden-inspired manicure. White petals, yellow centers, and scattered dots sit beautifully on pale blue, pink, green, or nude polish.
Paint two or three nails with daisies and use plain dots on the others. Make each flower with five small white dots around one yellow center. Avoid covering every nail with large flowers, which can make the pattern feel crowded. A lot of people skip this step, but leaving open space allows each daisy to remain clear. DIY nail art tools may cost $15 to $35. Salon pricing usually ranges from $50 to $85.
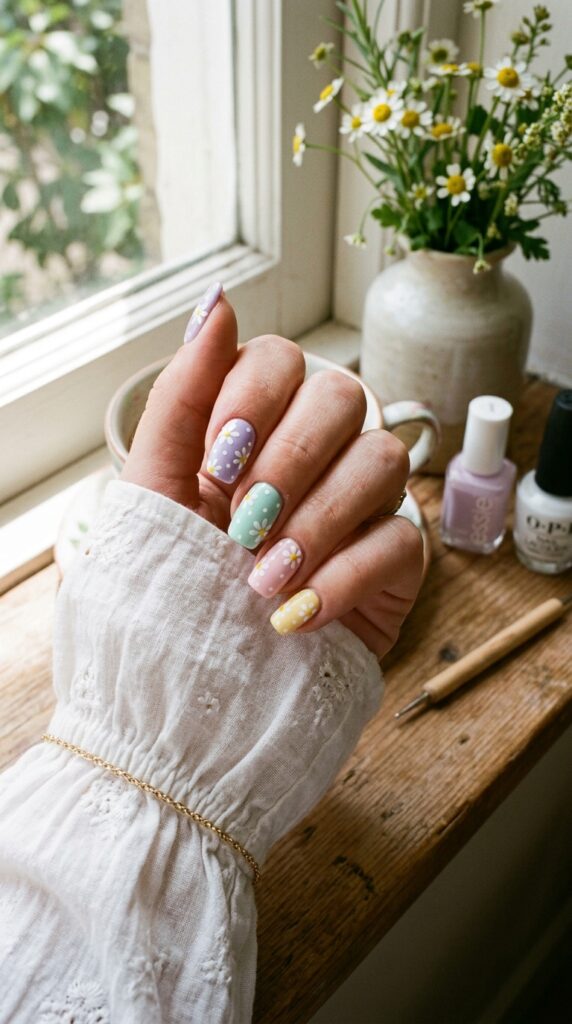
17. Gold Dots on Matte Burgundy
Matte burgundy creates a soft, velvety background for small gold dots. The metallic accents catch the light, while the deep red base keeps the manicure rich and balanced.
Apply burgundy polish, then seal it with a matte top coat. Add gold dots only after the matte layer has dried. Keep the dots small and place them along one edge or near the cuticle. Avoid covering the gold with matte top coat because it will remove the shine. Seal each dot carefully with a tiny amount of glossy top coat instead. DIY supplies may cost $15 to $35. A salon set generally costs $50 to $80.
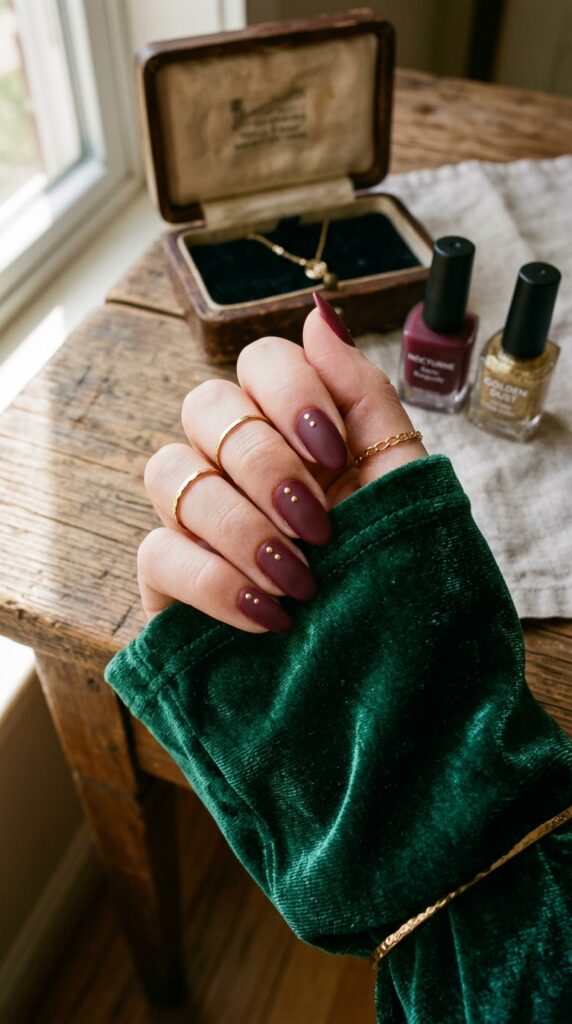
18. Rainbow Dots on Clear Nails
Clear nails with rainbow dots feel light, bright, and modern. Because the base remains transparent, the different colors do not overwhelm the manicure. This design looks especially attractive on short natural nails.
Apply a clear strengthening base, then scatter small dots in red, yellow, blue, green, and purple. Repeat the colors across the set for balance. Avoid placing every shade on every nail. Two or three colors per finger usually look cleaner. What I personally love about this is how affordable it can be when you use polish you already own. A DIY version may cost $5 to $25. Salon pricing ranges from $40 to $70.
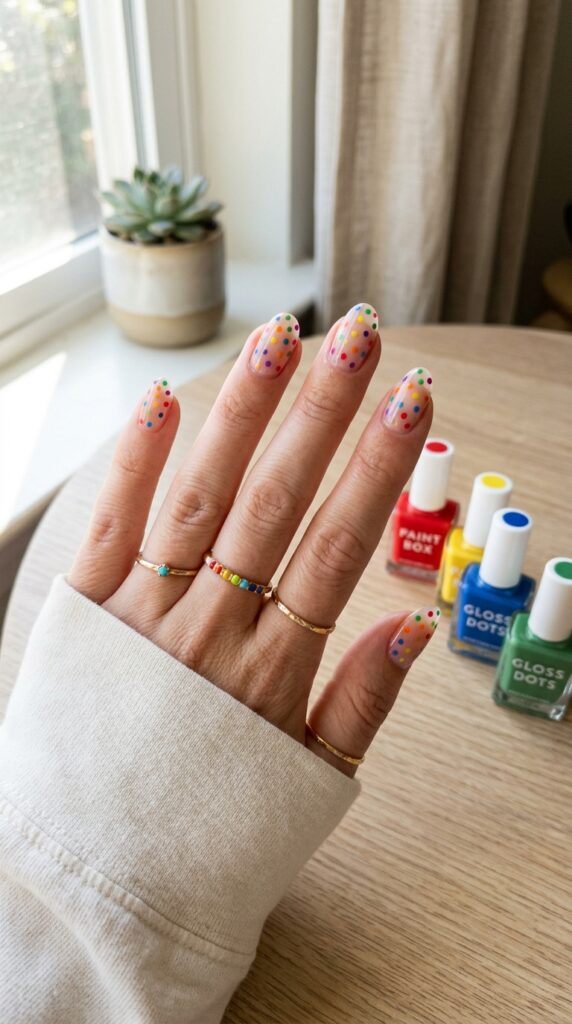
19. Polka Dot Nails in Soft Autumn Colors
Rust, mustard, cream, olive, and brown dots create a cozy seasonal palette. A neutral beige base keeps the colors easy to see while connecting the full design.
Use three or four autumn shades rather than every color on each nail. Alternate the placement so the pattern feels relaxed. Avoid choosing several dark colors without a lighter shade for contrast. In my experience, cream or mustard helps the design feel warmer and clearer. DIY materials may cost $15 to $40. A salon version typically ranges from $50 to $80.
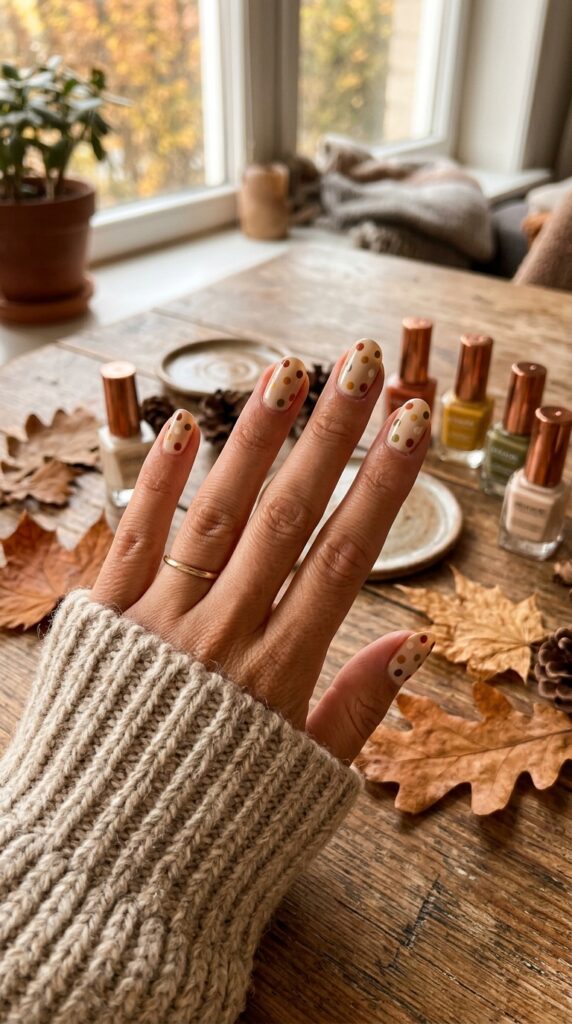
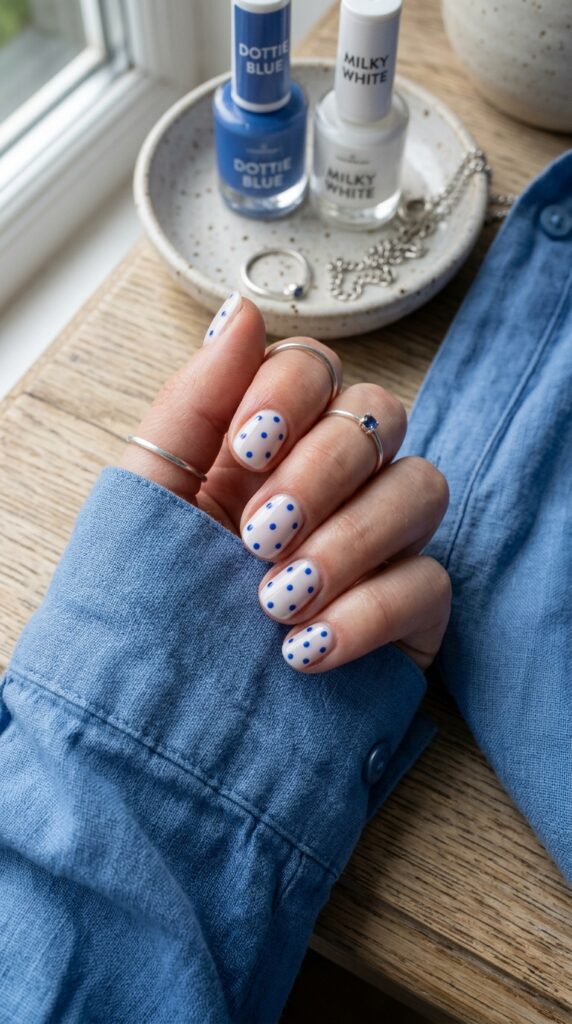
20. Blue Dots on a Milky White Base
A milky white base with blue dots feels fresh and slightly porcelain-inspired. You can use cobalt for strong contrast or dusty blue for a softer finish.
Apply one or two coats of translucent white polish. Add blue dots in loose rows or place them near the tips. Avoid using a pure white base that looks too thick or chalky. A milky finish gives the design more depth. A lot of people skip cleanup around the cuticles, but pale polish makes uneven edges more noticeable. DIY supplies cost around $10 to $30. Salon pricing may range from $40 to $70.
21. Dotted French Tips in Multiple Colors
Colorful dotted French tips replace a solid line with a row of tiny circles. The design follows the natural curve of the nail and leaves the center mostly bare.
Apply a sheer nude base, then add small dots along the tips in two or three shades. Keep the dots similar in size and close enough to create a clear curved edge. Avoid placing them too far down the nail, which can shorten the shape. I always recommend using the smallest dotting tool for short nails. DIY materials may cost $12 to $30. Salon prices range from $50 to $80.

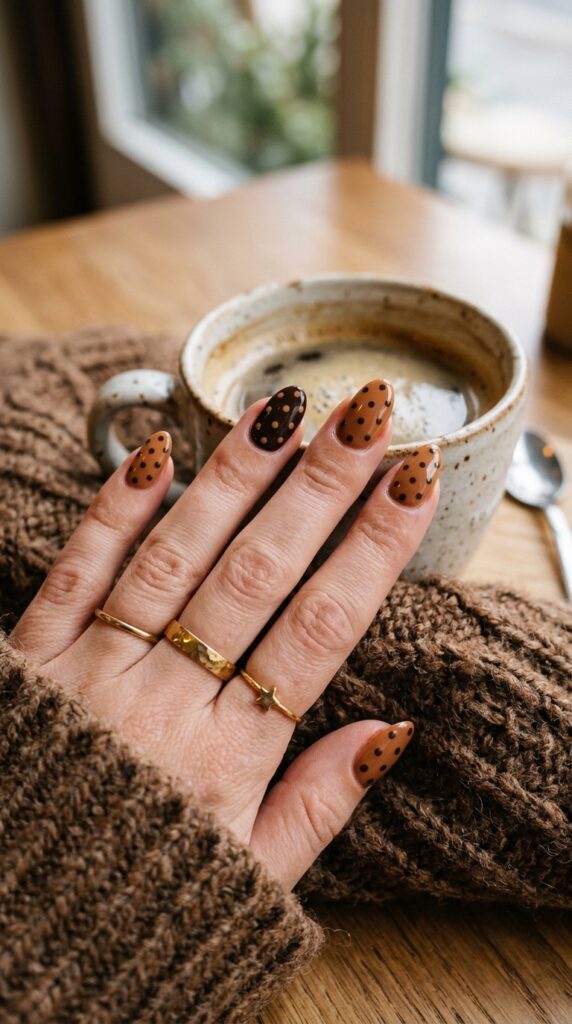
22. Espresso Dots on Caramel Nails
Caramel polish with dark espresso dots creates a warm café-inspired manicure. The color combination feels cozy and graphic, especially with a high-gloss top coat.
Apply two coats of caramel polish, then add small espresso dots. Reverse one accent nail with a dark base and lighter dots. Avoid choosing a caramel shade too close to your skin tone without enough contrast. Testing the polish in natural light can help. A DIY manicure usually costs $10 to $30. Salon gel may range from $40 to $70.
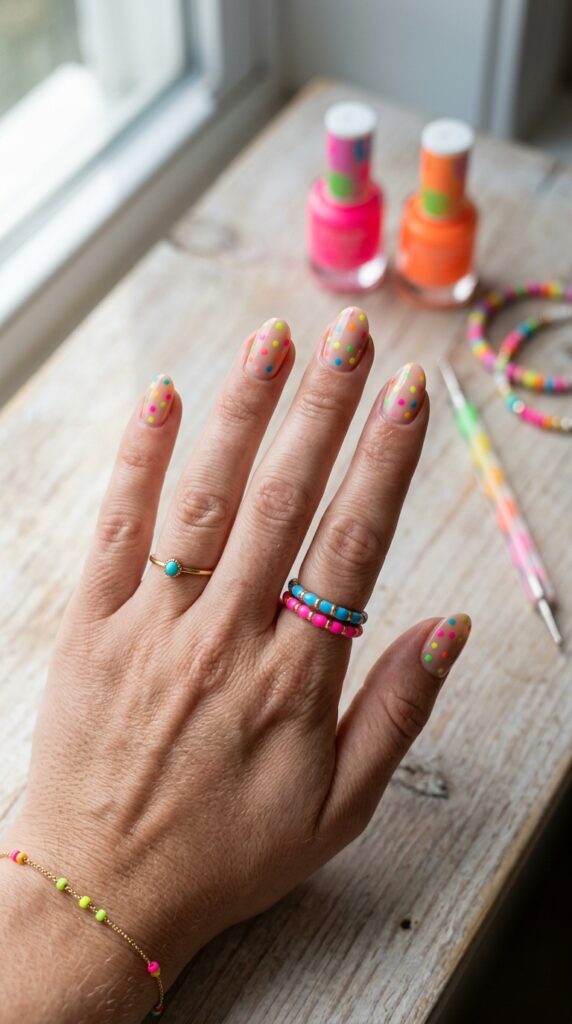
23. Neon Dots on a Nude Base
Neon dots add bright color without requiring a full fluorescent manicure. A sheer beige or pink base softens the strong shades and makes the design more wearable.
Add small neon pink, orange, yellow, and green dots across a fully dry nude base. Keep the circles widely spaced. Avoid using large dots because neon polish can dominate the nail quickly. What I personally love about this is that even a few dots create a noticeable change. DIY supplies may cost $15 to $35. Salon nail art generally ranges from $45 to $75.
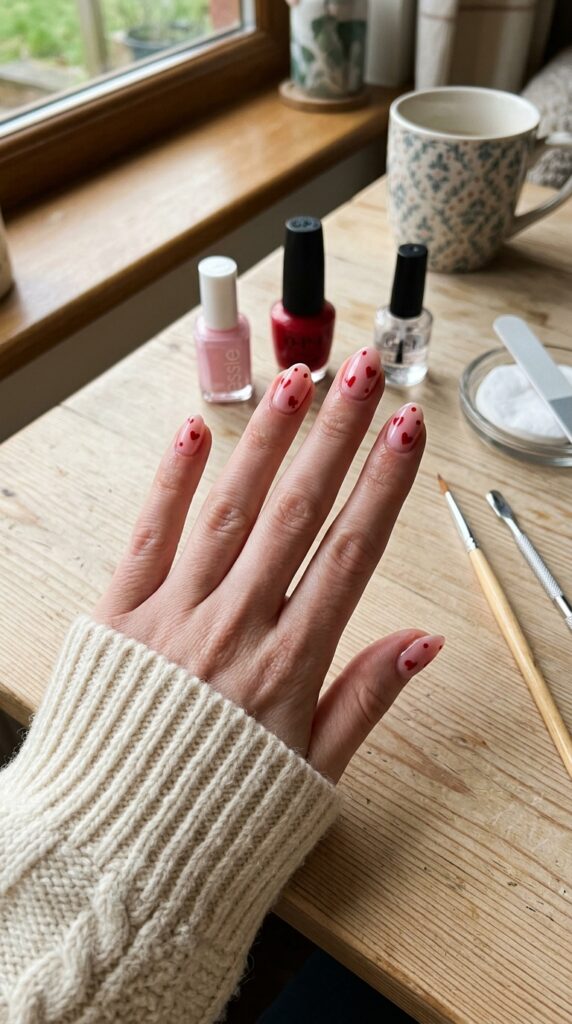
24. Tiny Heart and Dot Mix
Small hearts mixed with dots create a sweet manicure without requiring detailed painting. The hearts become the focal points, while the dots fill the empty spaces.
Use a pale pink, nude, or cream base. Create each heart by placing two dots side by side and dragging them downward into a point with a fine tool. Avoid making every heart the same size, but keep them small enough to stay clear. A lot of people skip practicing the shape first. Test it on paper before working on the nail. DIY materials may cost $12 to $30. Salon pricing often ranges from $50 to $80.
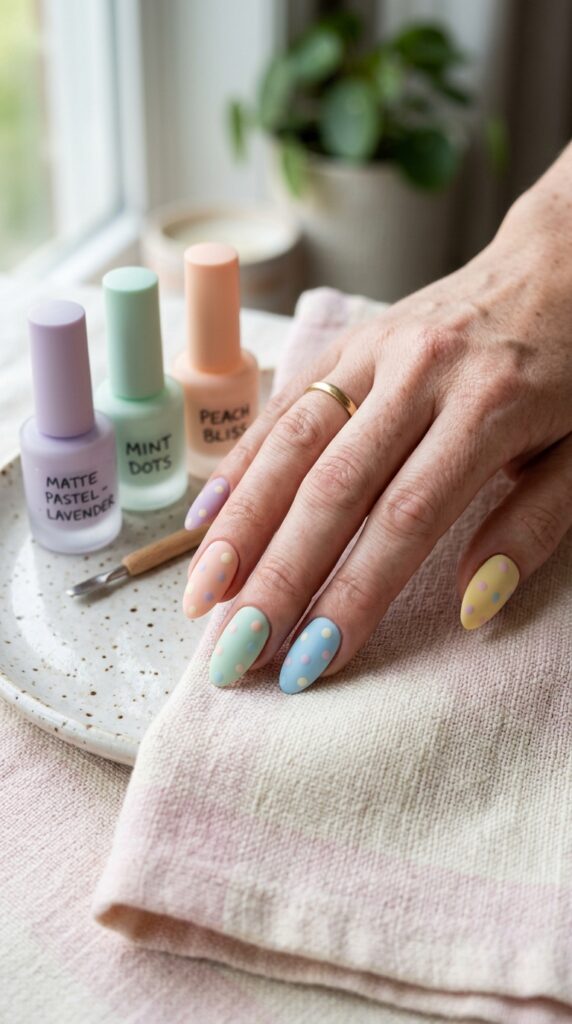
25. Matte Pastel Dot Nails
Matte pastel nails have a soft chalky finish that makes colorful dots feel calm rather than overly bright. Lavender, mint, peach, and pale blue work well together.
Paint each nail a different pastel shade or use one base color across the set. Add contrasting dots, then finish with matte top coat. Avoid applying hand cream immediately afterward because oils can leave shiny marks on the surface. In my experience, matte polish looks best when the base is very smooth. Use a ridge-filling coat if needed. DIY supplies may cost $15 to $40. Salon pricing ranges from $45 to $75.
26. Polka Dot Nails With Silver Chrome Accents
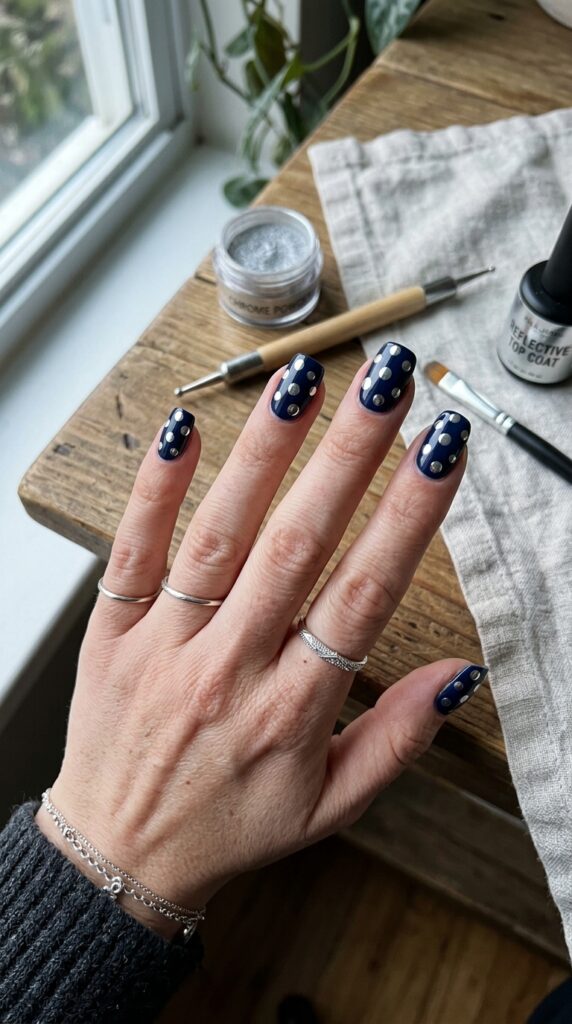
Silver chrome dots create a reflective pattern over black, navy, gray, or nude nails. The metallic circles catch the light differently from regular polish and give the design a modern finish.
Apply a solid base and cure it if using gel. Add chrome dots with a specialized gel or create raised circles before rubbing in chrome powder. Avoid making every dot large because the reflective finish can overpower the base. Keep most circles small and add only a few larger accents. DIY gel materials may cost $25 to $60. A salon chrome design often ranges from $55 to $90.
27. Lemon Yellow and White Dots
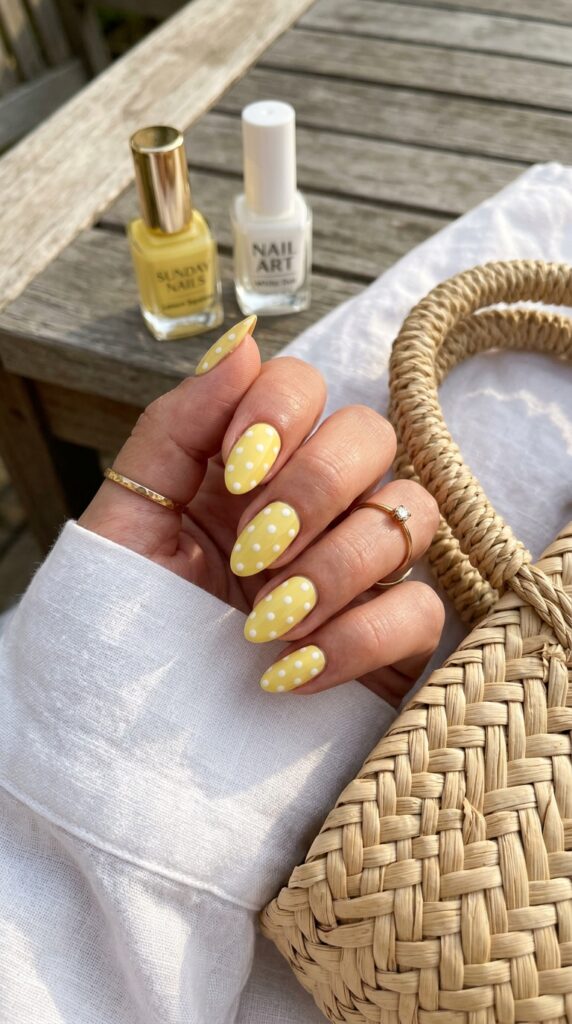
Lemon yellow nails with white dots feel sunny and cheerful. The light colors work beautifully on short nails and pair well with denim, white cotton, and woven summer accessories.
Use a smoothing base coat before applying yellow polish, as pale yellow can look streaky. Add small white dots after the base dries. Avoid thick yellow layers because they may dry unevenly. Three thin coats often create a cleaner finish. A DIY version costs around $10 to $30. Salon pricing usually ranges from $40 to $65.
28. Strawberry Pink With Seed-Like Dots
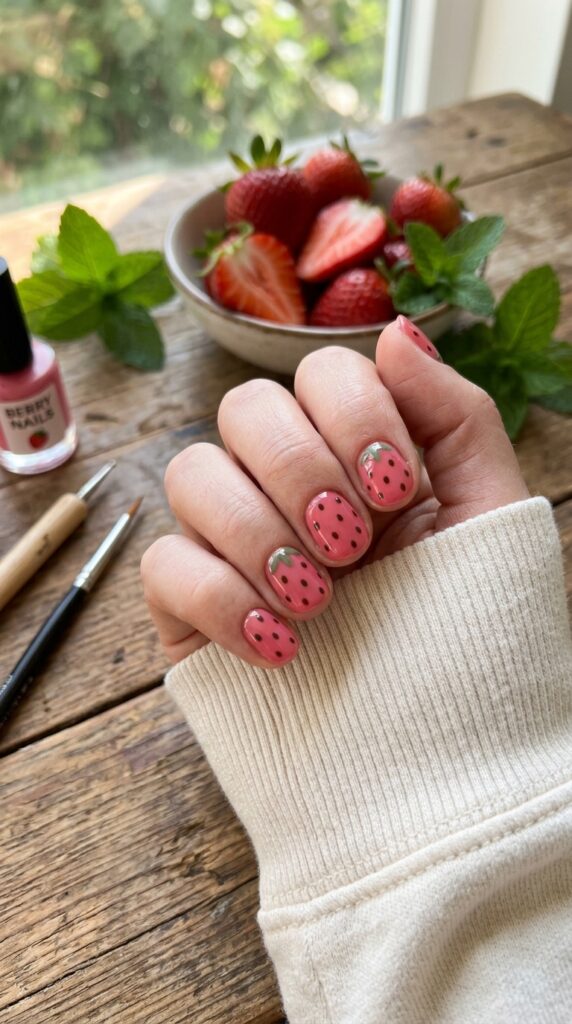
Strawberry pink nails with tiny dark seed-like dots offer a playful fruit-inspired twist. A green accent near the cuticle can suggest leaves without turning the design into detailed art.
Paint the nails a juicy pink-red shade. Add tiny dark dots in uneven rows, then place a small green curve near the base of one accent nail. Avoid using large black dots because they can look harsh against the fruit color. A fine tool creates a softer effect. DIY supplies may cost $12 to $35. Salon nail art usually ranges from $50 to $80.
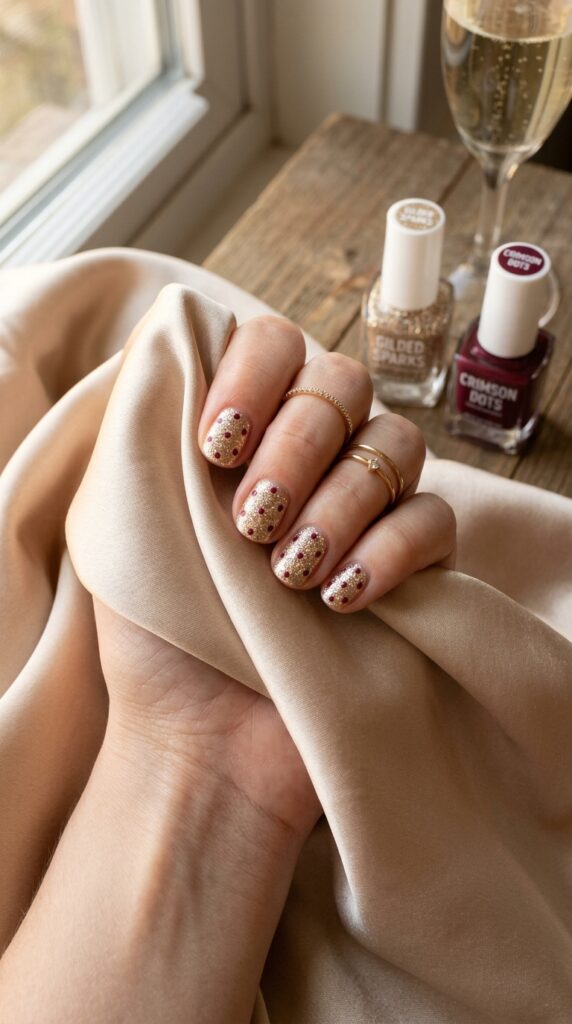
29. Polka Dots Over a Glitter Base
A fine glitter base gives simple dots extra depth. Champagne, rose gold, or silver shimmer works well beneath black, white, burgundy, or pastel circles.
Apply one thin glitter coat over a neutral base, then add dots after it dries. Keep the dot colors solid so they remain visible against the sparkle. Avoid using chunky glitter, which can make the dots sit unevenly. A smooth fine shimmer is easier to work with. What I personally love about this is how it looks different in natural and evening light. DIY supplies cost around $15 to $35. Salon prices may range from $50 to $80.
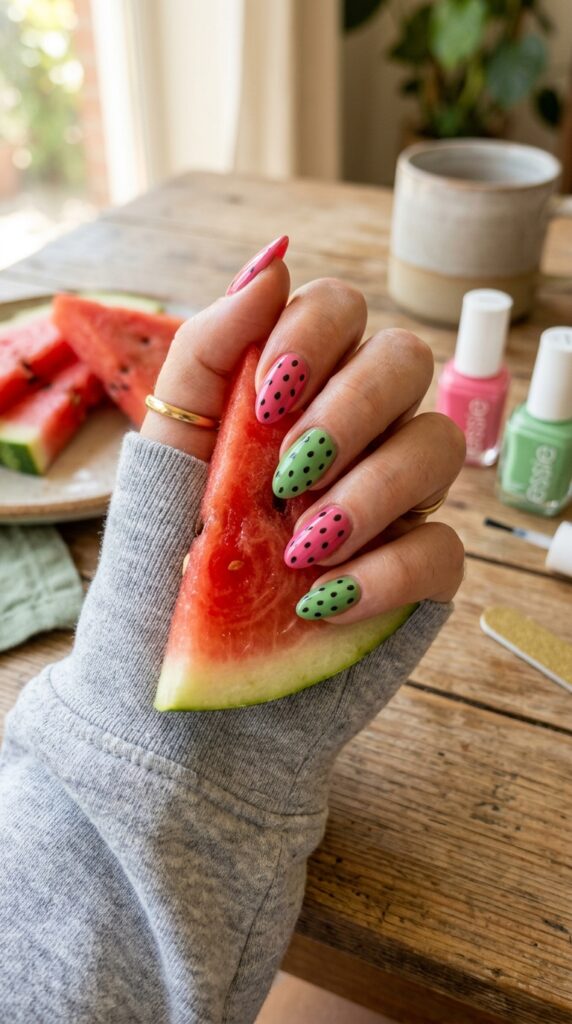
30. Green and Pink Watermelon Dots
Green and pink create a cheerful color combination inspired by watermelon without requiring detailed fruit slices. Pink nails with dark seeds and green dotted accents keep the set playful.
Use pink on most nails and green on one or two accent fingers. Add black or dark brown dots to the pink nails and pale dots to the green ones. Avoid adding too many shades because the design can become busy. Keep the palette limited to three main colors. DIY materials may cost $12 to $35. Salon pricing ranges from $45 to $75.
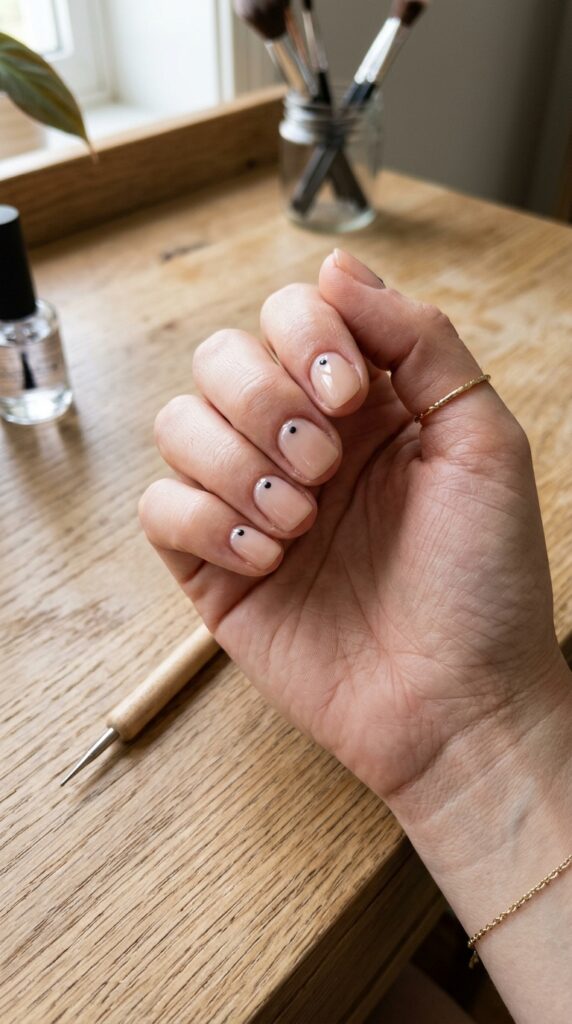
31. Minimal Single Dot Manicure
A single dot near the cuticle creates one of the simplest versions of polka dot nail art. The open space feels clean, while the tiny detail gives each nail a finished focal point.
Apply a nude, pink, or clear base. Place one small black, gold, red, or white dot near the center of each cuticle. Keep the placement at the same height across all nails. In my experience, the biggest mistake is making the dots too large. The beauty of this design comes from its small scale. A DIY manicure may cost $8 to $20. Salon pricing often ranges from $35 to $60.
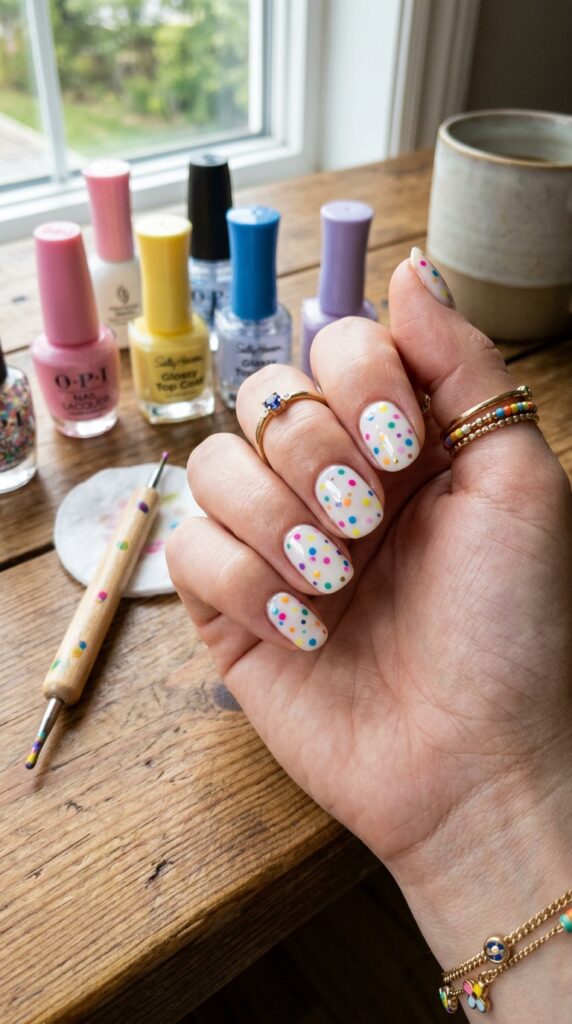
32. Confetti Dots on White Nails
Confetti dots bring together several bright shades over a clean white base. The result feels cheerful and celebratory, with each nail carrying a slightly different pattern.
Use small dots in pink, blue, yellow, orange, and green. Keep some space between the colors so the base remains visible. Avoid placing wet dots too close together because they may merge. A lot of people skip drying time between colors, but it prevents smearing. DIY supplies may cost $15 to $40. Salon pricing usually ranges from $50 to $80.
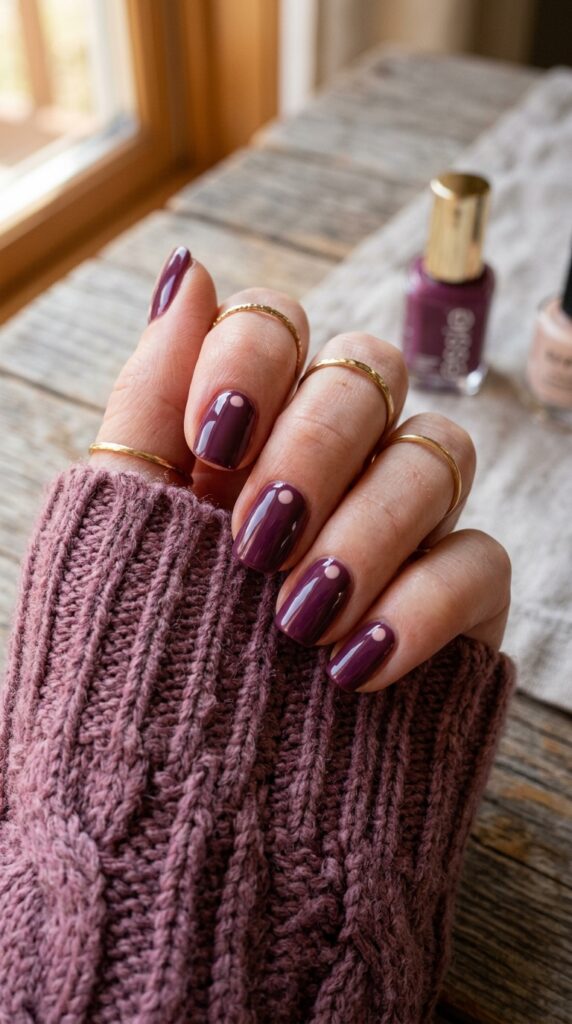
33. Plum Nails With Blush Dots
Deep plum and soft blush create a rich but feminine combination. The dark base feels polished, while pale dots lift the design and make it easier to notice.
Apply two thin coats of plum polish, then add small blush dots. Reverse the colors on one accent nail if you want more variation. Avoid using a blush shade that is too sheer because it may disappear over the dark base. Choose an opaque cream formula. DIY supplies may cost $10 to $30. A salon manicure usually costs $40 to $70.
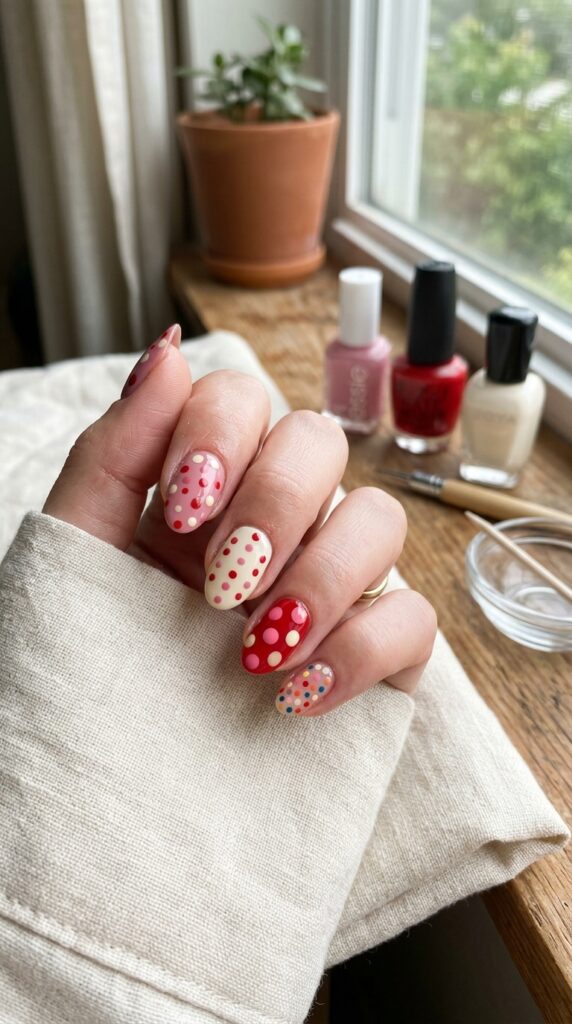
34. Mixed Polka Dot Nail Designs on Every Finger
A mixed manicure gives each finger a different version of the dot pattern. One nail may have tiny dots, another may feature a dotted French tip, and another may use a single cuticle dot. Repeating the same colors keeps the set connected.
Choose no more than three shades and plan the pattern before painting. Alternate busy designs with simpler nails so the manicure has room to breathe. Avoid introducing a new color on every finger. What I personally love about this approach is how creative it feels without needing advanced art skills. DIY supplies may cost $15 to $40. Salon pricing often ranges from $60 to $95.
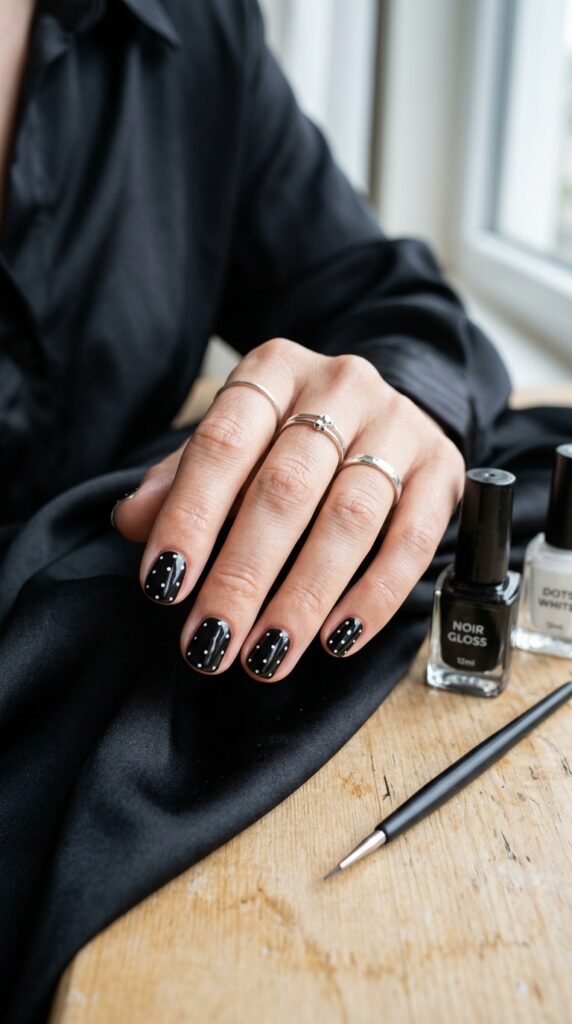
35. Tiny White Dots on Soft Black Nails
Soft black polish with tiny white dots creates a striking manicure that still feels wearable. The fine pattern resembles a delicate printed fabric, especially when the dots are evenly spaced.
Apply two thin coats of black polish and allow them to dry. Use a very small dotting tool for the white pattern. Keep the circles widely spaced so the black base remains dominant. Avoid using thick white polish, which can create raised dots that chip easily. Thin, controlled layers work better. A DIY manicure costs around $10 to $25. A salon gel set may range from $40 to $70.
Choosing Polka Dot Nails That Suit Your Style
A playful manicure does not need complicated tools, long extensions, or an expensive salon appointment. A few carefully placed dots can completely change a plain polish color, whether you use a bobby pin at home or ask a nail artist for a more detailed pattern.
These 35 polka dot nails that feel cute and playful include soft, bold, minimal, and seasonal options. Start with one or two ideas that match the colors you already enjoy wearing. A single-dot manicure is easy for beginners, while mixed dots, chrome accents, and dotted French tips offer more detail.
You can also simplify any design by decorating only one accent nail. This saves time, uses less polish, and makes the pattern easier to control. Apply thin layers, let each color dry, and finish with a smooth top coat for a cleaner result.
Which idea would you try first? I’d love to hear what you’re planning.
Frequently Asked Questions
How do you make neat polka dots on nails?
Use a dotting tool, bobby pin, toothpick, or the rounded end of a makeup brush. Dip the tool lightly into polish and place it straight onto the nail without dragging. Test the dot size on paper before applying it to your manicure.
Can you create polka dot nails without nail tools?
Yes. Bobby pins create medium dots, while toothpicks make smaller circles. You can also use the end of a sewing pin pushed into a pencil eraser for better control. Clean the tool between colors to prevent muddy polish.
What base colors work best with polka dots?
Sheer nude, white, cream, pale pink, black, and soft pastels all work well. Choose a dot color with enough contrast to remain visible. Test the two shades together before painting all ten nails.
How do I stop nail polish dots from smearing?
Allow the base polish and dots to dry before applying top coat. Float the top coat brush over the nail rather than pressing down firmly. A quick-dry formula can help, but thick dots may still need extra time.
How much do polka dot nails cost at a salon?
A basic gel manicure with simple dots may cost $40 to $70. Mixed patterns, chrome, detailed accents, or extensions may raise the price to $55 to $95. Pricing varies by location, nail length, and the amount of art requested.