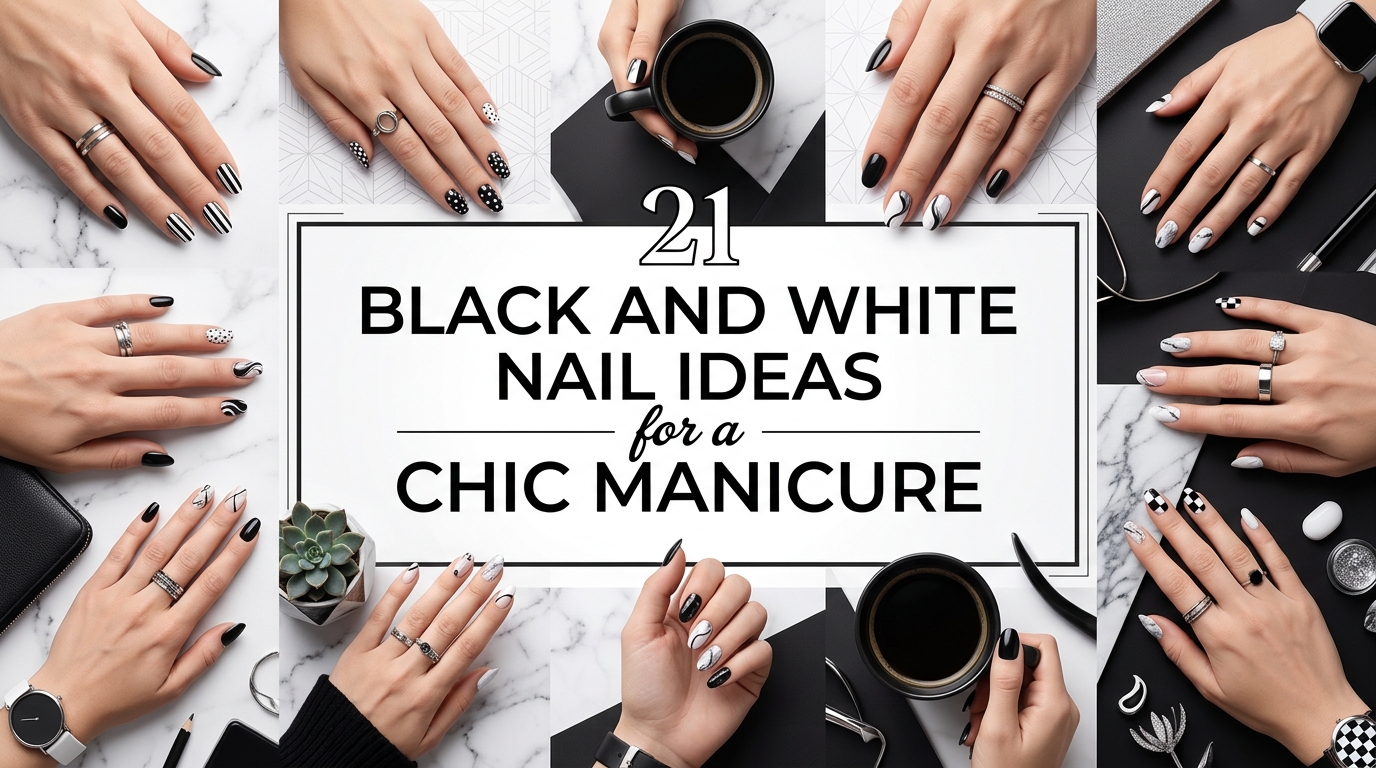
21 Black and White Nail Ideas for a Chic Manicure
Choosing nail art can feel surprisingly difficult when you want something bold but still easy to wear. Bright colors may not suit every outfit, while detailed patterns can look crowded or become tiring after a few days. Black and white offers a cleaner way to add contrast without filling your manicure with too many shades.
These 21 black and white nail ideas for a chic manicure range from fine French tips and tiny dots to checkerboards, florals, chrome accents, and soft marble patterns. Some designs feel sharp and graphic, while others use sheer nude polish to create a lighter look.
Each idea includes practical advice on placement, tools, shape, and cost. You will also find small mistakes to avoid, especially when working with highly pigmented black polish. You do not need advanced nail art skills or a large collection of products. A white polish, black polish, fine brush, dotting tool, and glossy top coat can create many of these looks. Begin with one or two accent nails if a full patterned set feels too busy.
1. Classic Black and White French Tips
A black and white French manicure feels crisp, polished, and easy to style. Alternate thin black and white tips across the hand, or use white tips with a fine black line underneath. A sheer pink base keeps the contrast soft enough for everyday wear while allowing the graphic edges to stand out.
Apply one or two coats of translucent nude polish. Use a fine liner brush to paint narrow tips that follow the natural curve of each nail. In my experience, the biggest mistake is making the lines too thick, especially on short nails. Thin tips leave more of the nail bed visible and create a lighter finish. A DIY set with black, white, and base polish may cost between $15 and $40. A salon gel version usually ranges from $40 to $75, depending on the amount of hand painted detail.
2. Fine Black Tips Over a Milky Base
A narrow black French tip over milky nude polish creates strong contrast without covering much of the nail. The glossy black edge looks almost like a fine ink line, while the cloudy base keeps the manicure gentle and wearable. This works well on short square, rounded, or almond nails.
Build the base with two thin layers of milky pink or beige. Paint the black edge using a long liner brush rather than the polish bottle brush. Wipe most of the polish from the brush before touching the nail. A lot of people try to correct the tip repeatedly, which makes it thicker and less even. Use one steady curve, then clean the edge with a small brush dipped in remover. DIY supplies may cost between $12 and $35. A salon version often costs around $35 to $70.
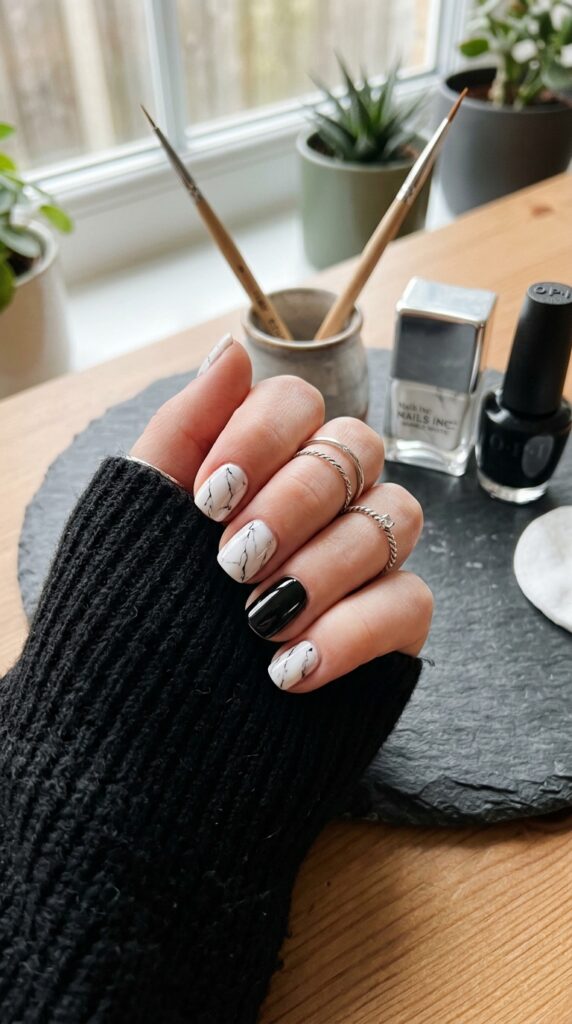
3. White Nails With Tiny Black Dots
Tiny black dots add enough detail to make white nails feel playful without creating a busy pattern. The sharp contrast looks especially clean on short rounded nails. You can place one dot near each cuticle or scatter two or three unevenly across an accent nail.
Apply two light coats of creamy white polish and allow the surface to dry. Use a small dotting tool, toothpick, or the rounded end of a hairpin to add the black marks. What I personally love about this design is how little equipment it requires. Avoid loading the tool with too much polish, as large dots can spread and lose their shape. A dotting tool and two polishes may cost between $12 and $30. A salon manicure with simple dot work usually ranges from $30 to $60.
4. Black Nails With White Star Details
Glossy black polish creates a dramatic background for tiny white stars. The design feels dreamy and polished when the stars are kept small and spaced carefully. One or two accent nails can carry the pattern while the remaining nails stay solid black.
Paint two controlled coats of black polish and let them set. Use a fine brush to draw simple four point stars, or apply tiny white star decals with tweezers. In my experience, the biggest mistake is adding too many decorations to every nail. Leave generous black space around each star so the design stays clear. Seal stickers and painted art with a smooth top coat. A decal sheet may cost between $5 and $15, while a complete DIY manicure may cost $15 to $35. Salon pricing often ranges from $40 to $75.
5. Black and White Checkerboard Nails
Checkerboard nail art creates a bold graphic manicure that feels playful and modern. The pattern can cover one accent nail or appear in smaller sections across several nails. Pairing the checkerboard with solid black and white polish helps the full set feel balanced.
Begin with a white base on the patterned nails. Use a fine brush to draw a simple grid, then fill alternating squares with black. A lot of people create too many tiny boxes, which makes uneven lines easier to notice. Use a two by three or three by three layout depending on the size of your nail. Short square nails suit this pattern particularly well. A DIY brush and polish set may cost between $15 and $35. Detailed salon art can range from $45 to $85.
6. Chic Black and White Swirl Nail Ideas
Black and white swirls create movement without requiring a complicated picture on each nail. Curved lines look especially striking over a sheer nude base because the natural nail remains part of the design. The result feels artistic but still light enough for daily wear.
Apply a clear or translucent pink base. Use a long nail art brush to draw one black curve and one white curve across each nail. Change the placement slightly while keeping the line thickness similar. In my experience, the biggest mistake is adding too many swirls to a small nail plate. One or two flowing lines are usually enough. Use a glossy top coat to smooth any raised paint. A fine brush and polish set may cost between $15 and $40. Salon pricing often falls between $45 and $80.
7. Half Black and Half White Nails
A clean split down the center creates one of the strongest black and white designs. The manicure feels sharp and balanced, especially when every nail uses the same vertical division. A glossy finish makes the contrast look smooth and deliberate.
Paint the entire nail white first because it is easier to cover white with black than the other way around. Once dry, use striping tape or a fine brush to paint one half black. Remove tape before the polish becomes fully dry to reduce rough edges. What I personally love about this look is that it needs no extra decoration. Avoid placing the center line at a different angle on each nail unless you want a more abstract result. DIY materials may cost between $15 and $35. Salon pricing usually ranges from $40 to $75.
8. Black Florals Over a White Base
Fine black flowers over white polish create a delicate hand drawn effect. The contrast looks like ink on paper, making it a beautiful option for anyone who enjoys botanical patterns without adding color. Keeping the artwork on two or three nails prevents the design from feeling crowded.
Apply a creamy white base and use a fine brush to draw thin stems, small leaves, and simple petals. Keep the flowers slightly different rather than copying the same arrangement on every nail. A common mistake is using thick lines that hide the white background. Thin the art polish if the product allows, and wipe excess from the brush. A fine nail art brush may cost between $5 and $15, while the full DIY set may cost $15 to $40. Salon art can range from $45 to $85.
9. White Florals Over Glossy Black
White petals look bright and clean against a glossy black base. A few small flowers near the cuticle or side of the nail create a softer version of dark nail art. Rounded and oval nail shapes help the floral pattern feel gentle rather than severe.
Paint two thin black coats, then create five small white dots for each flower. Pull each dot slightly toward the center with a fine brush and finish with a tiny black or silver center. In my experience, the biggest mistake is using flowers that are too large for the nail. Keep them small enough that the black polish remains visible around the petals. A dotting tool and polish set may cost between $12 and $30. Salon pricing typically ranges from $40 to $80.
10. Black and White Marble Nails
Black and white marble creates a soft stone effect with fine irregular lines and cloudy sections. It looks detailed without requiring an exact repeated pattern. Using marble on two accent nails and solid polish on the others keeps the manicure easy to style.
Start with a white base and add very thin black lines using a fine brush. Soften parts of each line with a small amount of clear or milky polish before the design dries. What I personally love about marble art is that uneven lines often make it look more realistic. Avoid drawing straight, evenly spaced stripes. Natural marble lines change direction and thickness. A DIY set may cost between $15 and $40. Salon marble designs usually range from $45 to $85.
11. Black Base With White Side French Lines
A white side French line creates a bright curved edge against glossy black polish. The angled shape adds movement and can make the nail look slightly longer. This works especially well on short oval or almond nails.
Apply the black polish first and allow it to set fully. Use a thin brush to draw a narrow white curve from one side of the cuticle toward the opposite tip. Repeat the same direction across the full hand for a connected look. A lot of people make the white section too wide, which covers the black base and reduces the sharp contrast. Keep the line fine and clean. A DIY version may cost between $12 and $35. A salon manicure with hand painted curves may cost between $40 and $75.
12. White Base With Thin Black Frames
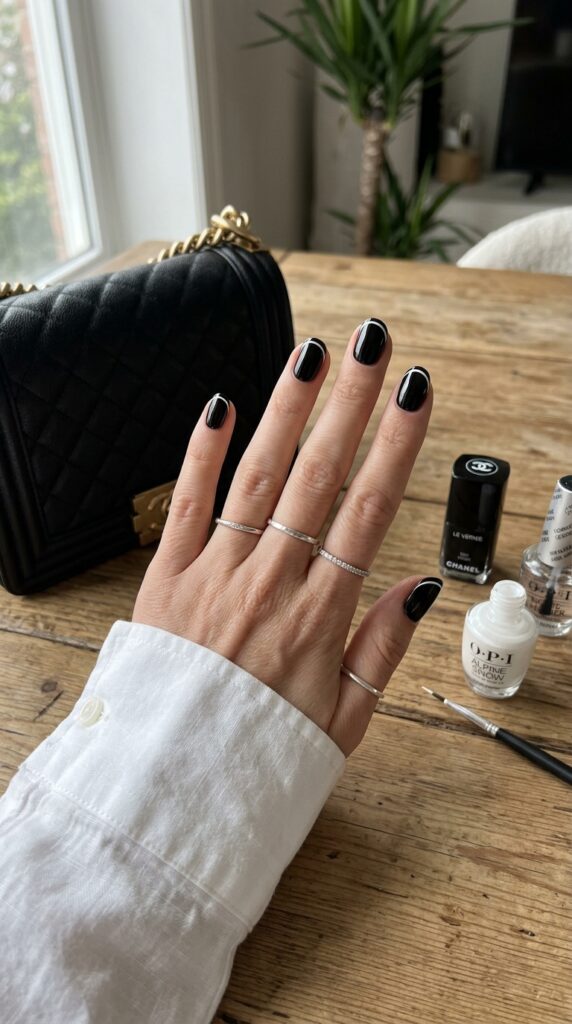
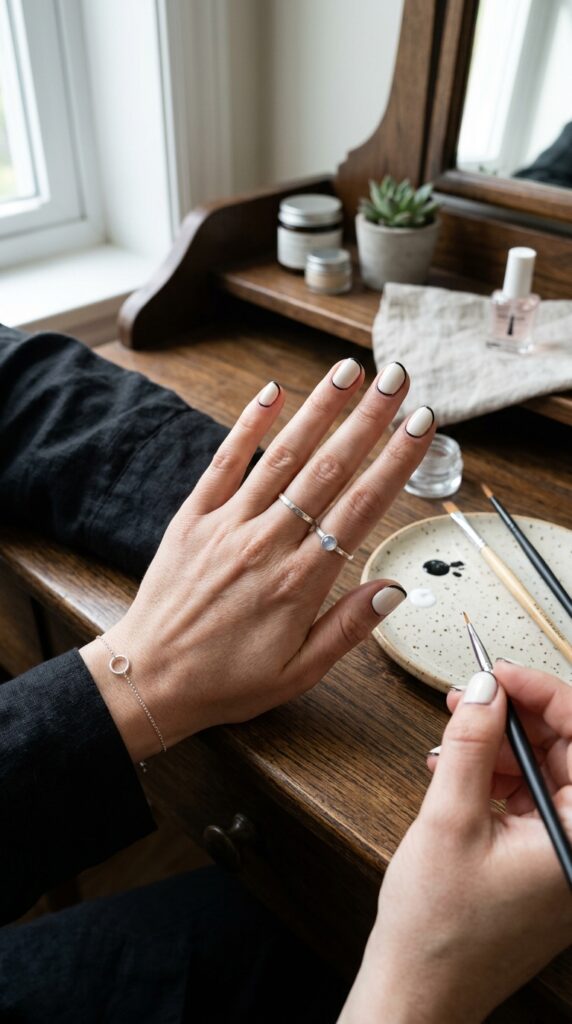
Outlined nails use a fine black line around the edge of a white or milky base. The result resembles a tiny picture frame and gives the nail a crisp graphic shape. It works best when the outline remains narrow and follows the natural curve.
Apply the white base and wait until it is stable. Use a long fine brush to trace the sidewalls, cuticle curve, and free edge. Work in sections rather than trying to draw the entire border in one stroke. In my experience, the biggest mistake is placing black polish directly on the skin while outlining near the cuticle. Leave a tiny clean gap and use a cleanup brush when needed. DIY supplies may cost between $15 and $35. Salon pricing often ranges from $45 to $80.
13. Black and White Polka Dot Manicure
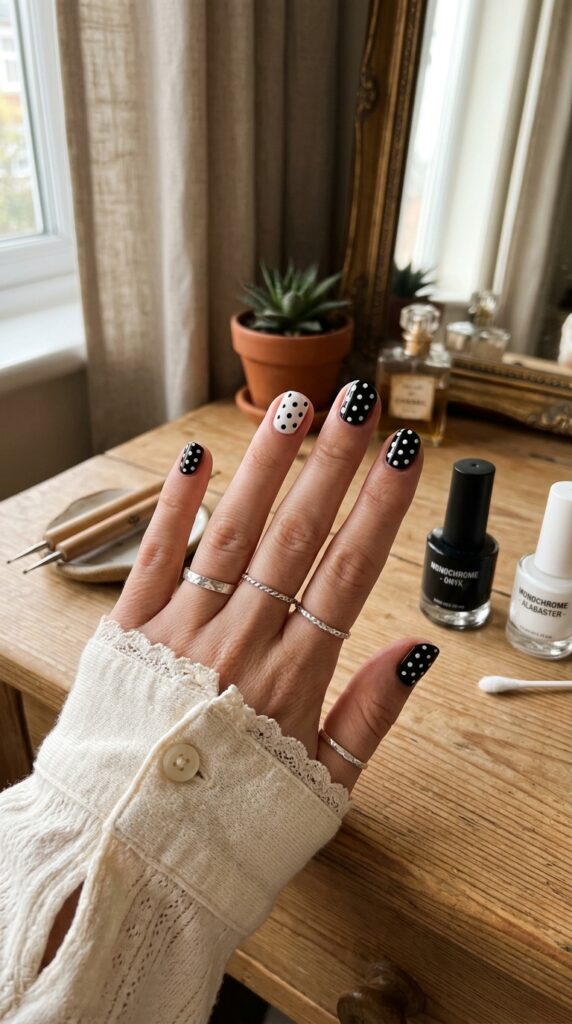
Polka dots give black and white nails a cheerful vintage feel. White dots over black look bold, while black dots over white create a lighter finish. Alternating the two styles across the hand makes the manicure more playful without adding another color.
Use a medium dotting tool and keep each dot similar in size. Begin near the center of the nail, then work outward so the spacing remains balanced. A common mistake is placing the dots too close together, causing them to merge. Leave enough background visible between each mark. Short rounded nails work well with a small, evenly spaced pattern. A dotting tool and two polishes may cost between $12 and $30. Salon pricing generally ranges from $35 to $70.
14. Abstract Black Brushstrokes on White
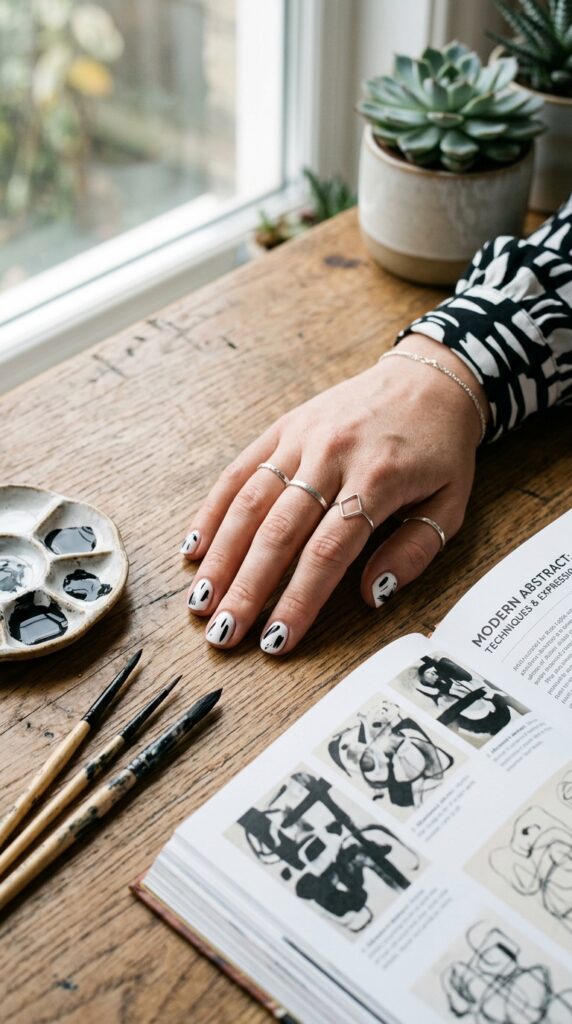
Loose black brushstrokes over white polish create an artistic design that does not need sharp symmetry. Each nail can feature one curved mark, soft stripe, or irregular painted section. The look feels modern and works well on short nails because the design can be scaled easily.
Apply two thin white coats, then remove most of the black polish from a flat or fine brush. Paint one controlled stroke across each nail. What I personally love about this style is that small differences make the set feel more natural. Avoid covering every nail with several heavy marks. Leave enough white space to keep the contrast clear. A nail art brush and basic polish may cost between $12 and $35. Salon pricing often ranges from $40 to $75.
15. Black Hearts on a Milky Nude Base
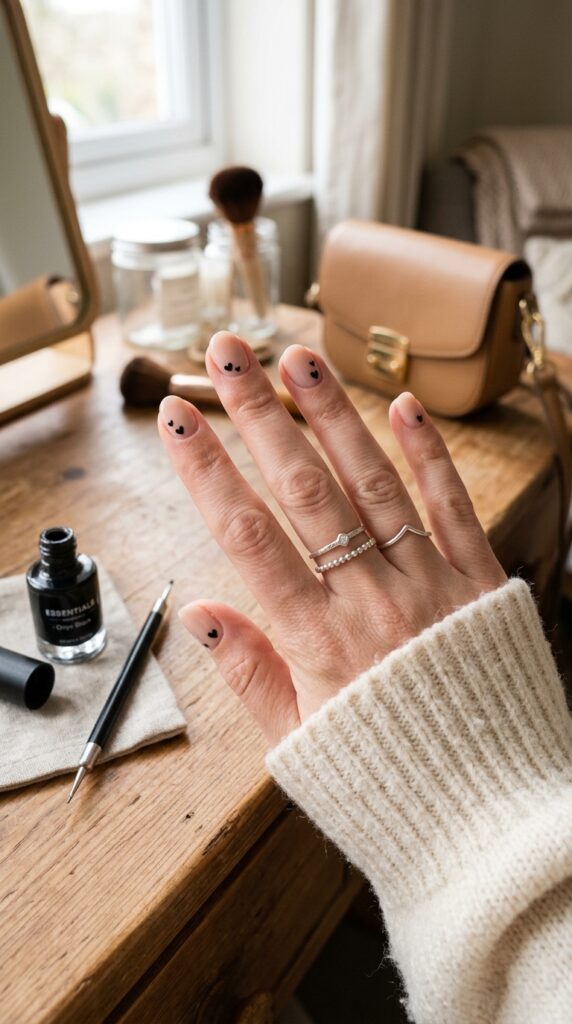
Tiny black hearts look sweet without becoming overly colorful. A milky nude base softens the dark details and leaves the manicure easy to pair with everyday outfits. One heart near each cuticle or a pair of hearts on accent nails creates a balanced design.
Use a small dotting tool to place two black dots close together, then pull them downward with a fine brush to form the point. Keep the hearts similar in size but allow slight placement changes. In my experience, the biggest mistake is adding too much polish, which causes the shape to spread. Practice one heart on paper or a nail swatch first. A dotting tool and polish set may cost between $10 and $30. Salon nail art typically ranges from $35 to $70.
16. Reverse French Black and White Nails
A reverse French manicure places the contrast near the cuticle instead of at the free edge. A white crescent on black polish looks bold, while a black crescent over milky white feels more delicate. The curved section highlights the natural shape of the nail bed.
Apply the main base color and use a fine brush to paint a narrow crescent near the cuticle. Leave a small gap between the polish and the skin. A lot of people make the crescent too tall, which shortens the visible center of the nail. Keep the shape low and follow the natural curve. Alternating black and white across the hand adds visual interest. A DIY version may cost between $15 and $35. Salon pricing generally ranges from $40 to $80.
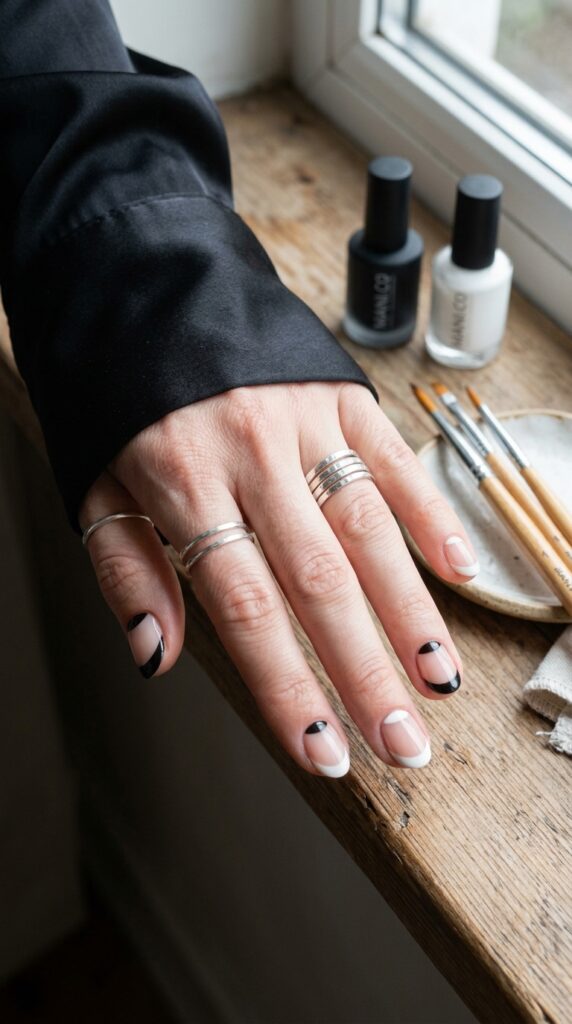
17. Mixed Black and White Nail Ideas With Negative Space
Negative space keeps black and white nail art from feeling too heavy. Sheer sections can sit between stripes, curves, dots, or half painted areas. The visible natural nail creates breathing room and makes each graphic detail easier to see.
Apply a clear or sheer nude base. Choose two simple shapes for the full set, such as black side curves and white corner blocks. Keep the placement varied but repeat the same colors and line width. What I personally love about negative space is that it makes detailed art feel lighter on short nails. Avoid adding a different pattern to every finger, which can make the set feel disconnected. A DIY kit may cost between $15 and $40. Salon pricing often ranges from $45 to $85.
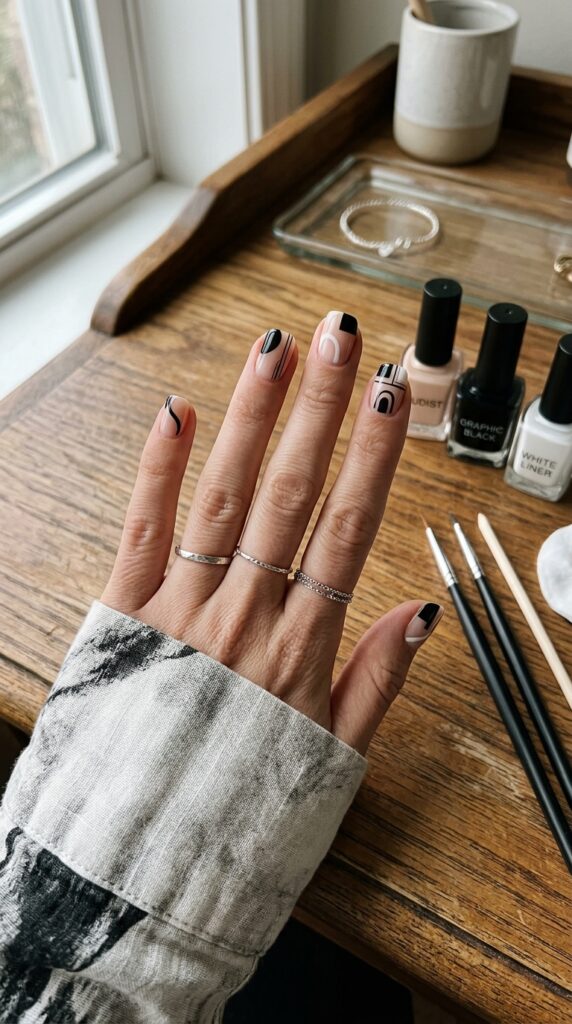
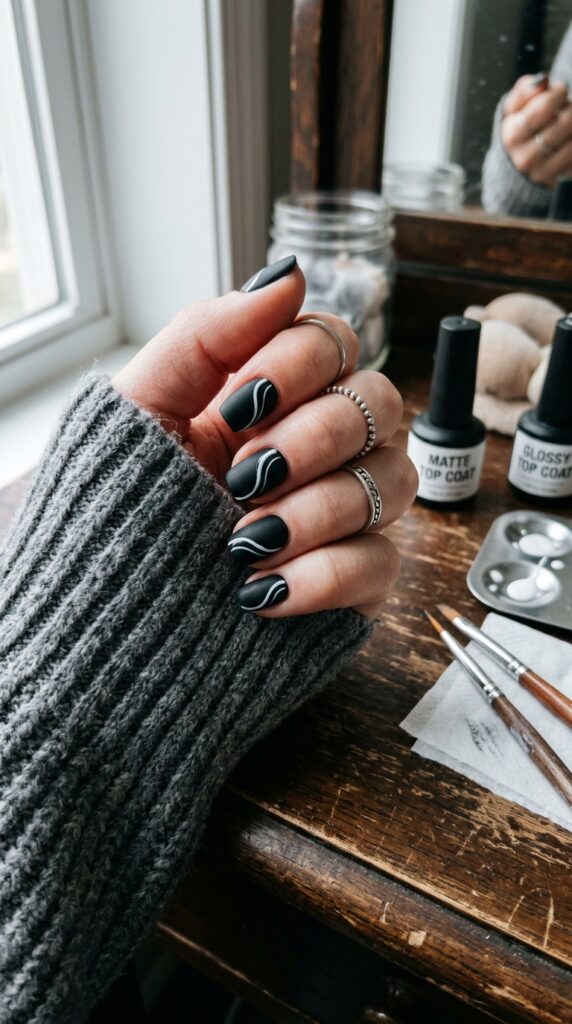
18. Matte Black Nails With Glossy White Lines
Matte black polish creates a soft velvet like background for glossy white lines. The change in finish adds interest even when the design remains simple. Vertical lines, curves, or small corner details all work well on short nails.
Paint the nails black and finish with matte top coat. Once the surface has set, use white polish and a fine brush to draw one line on each nail. Seal only the white art with a small amount of glossy top coat if you want to keep the black background matte. A common mistake is brushing glossy top coat across the full nail, which removes the contrast in texture. DIY supplies may cost between $18 and $40. Salon pricing can range from $45 to $80.
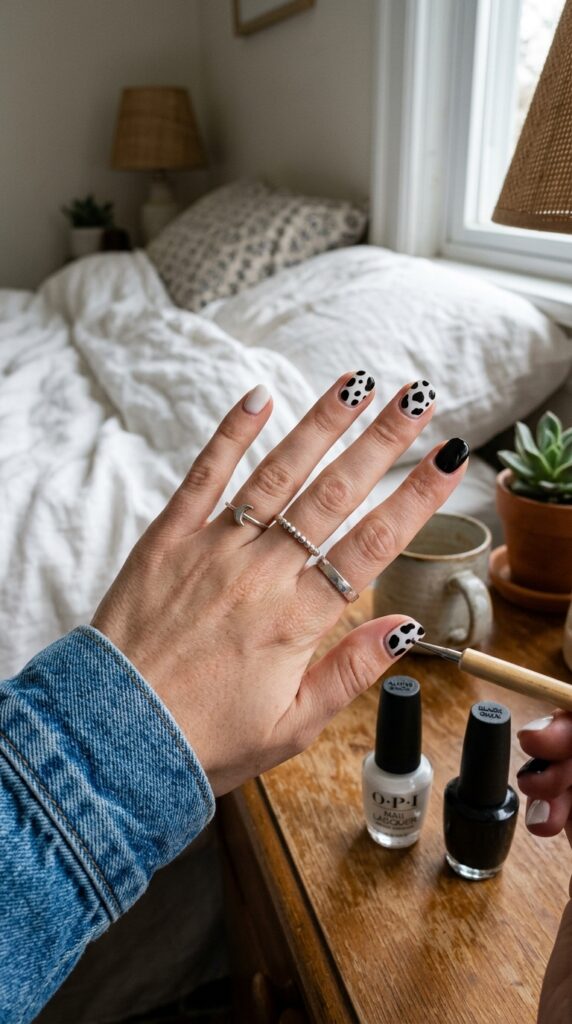
19. Black and White Cow Print Nails
Cow print creates an irregular black pattern over a white or milky base. The uneven shapes make it easier to recreate than precise checkerboards or stripes. Use the print on two accent nails and keep the rest solid for a cleaner finish.
Apply the pale base, then paint small black shapes with a dotting tool or fine brush. Make some marks rounded and others slightly stretched. In my experience, the biggest mistake is spacing every spot evenly. The pattern should look scattered and organic. Keep a little white space around each shape so the nail does not appear mostly black. A DIY manicure may cost between $12 and $30. Salon cow print art generally ranges from $40 to $75.
20. Thin Black Stripes Over White Polish
Fine black stripes create a clean tailored design over white nails. Vertical lines can make short nails appear longer, while diagonal lines add more movement. One stripe per nail keeps the pattern minimal and easy to wear.
Apply a creamy white base and let it dry. Use striping tape as a guide or draw a narrow black line with a long liner brush. Keep the stripe slightly off center for a modern look. A lot of people press tape onto polish that is still soft, which can lift the base color. Give the white layer enough time to set first. A striping tape roll and polish may cost between $12 and $30. Salon pricing usually ranges from $35 to $70.
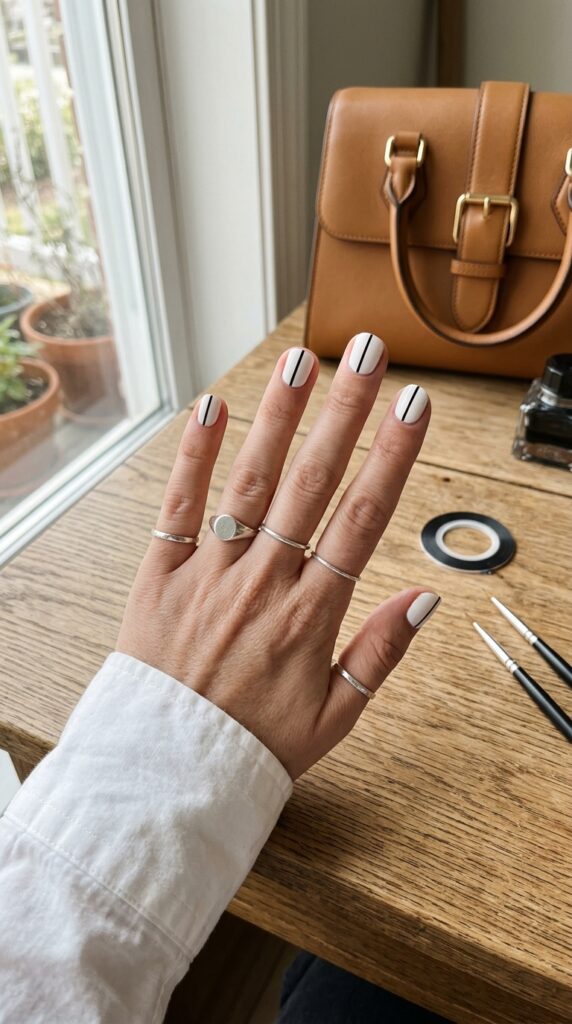
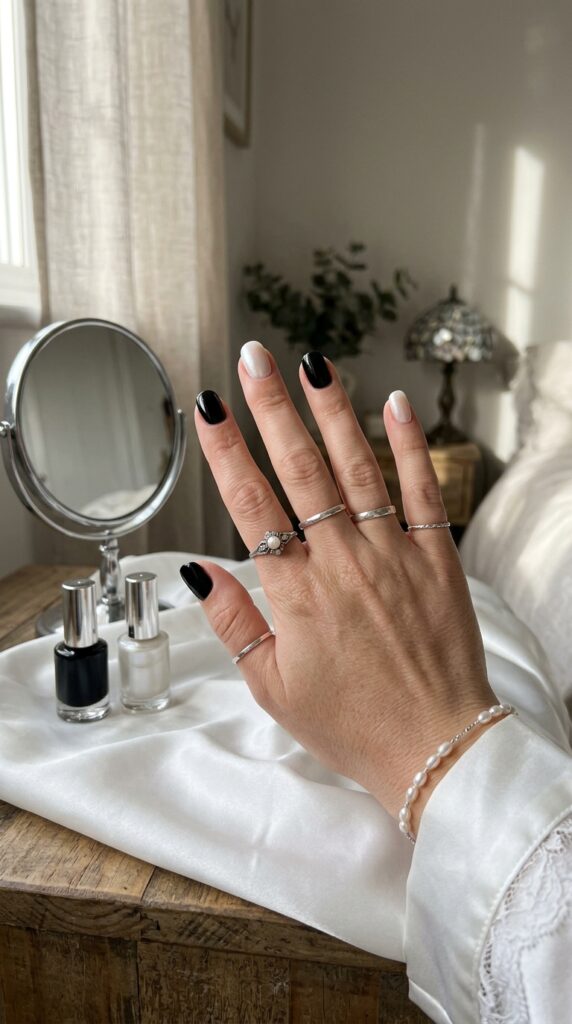
21. Mixed Glossy Black and Pearl White Nails
Combining glossy black with pearl white creates a manicure that feels rich without detailed art. Alternate the shades across the hand or use pearl white on the middle and ring fingers. The reflective white finish softens the solid black and catches light beautifully.
Apply two thin coats of black to some nails and milky white to the others. Add a fine pearl pigment or shimmer top coat over the white nails only. What I personally love about this design is that it looks detailed even though each nail uses a solid finish. Avoid using chunky glitter when you want a smooth pearl effect. Choose a finely milled shimmer and seal it well. DIY products may cost between $20 and $45. A salon gel version often ranges from $40 to $75.
Black and White Nails Can Be Bold or Delicate
A monochrome manicure does not need to look harsh or overly graphic. Thin lines, milky bases, tiny dots, and negative space can make black and white feel soft and wearable. Checkerboards, stars, marble, and cow print offer more contrast when you want something playful.
These 21 black and white nail ideas for a chic manicure can be adjusted for short, medium, or long nails. Begin with one or two accent fingers if you are painting the design at home. A simple black French tip or dotted white nail is easier to control than a full set of detailed patterns.
You do not need a large beauty budget to recreate these ideas. Start with reliable black and white polishes, a base coat, a fine brush, and a smooth top coat. Clean cuticle lines and thin layers often matter more than extra decorations.
Which black and white nail idea would you try first? I’d love to hear what you’re planning.
Frequently Asked Questions
Do black and white nails work on short nails?
Yes. Fine French tips, dots, small hearts, stripes, and negative space designs work especially well on short nails. Keep each detail small enough that the base color remains visible.
How do I stop white nail polish from looking streaky?
Apply a smoothing base coat and use two or three thin color layers. Allow each coat to settle before adding the next one. Avoid pressing the brush too firmly, as this can pull away the polish underneath.
How can I keep black polish from staining my nails?
Use a protective base coat before applying black polish. During removal, hold a soaked cotton pad on the nail briefly before wiping instead of rubbing color over the surrounding skin. Clean leftover pigment gently.
What nail shapes suit black and white designs?
Rounded, oval, square, almond, and squoval shapes all work well. Graphic patterns often suit square nails, while curved French lines and florals look gentle on oval or almond shapes. Choose a shape that supports your natural nail length.
Can beginners recreate black and white nail art?
Yes. Begin with dots, stripes, alternating solid colors, or one small heart. A fine brush and dotting tool make placement easier. Practice detailed shapes on paper or a nail swatch before painting your nails.