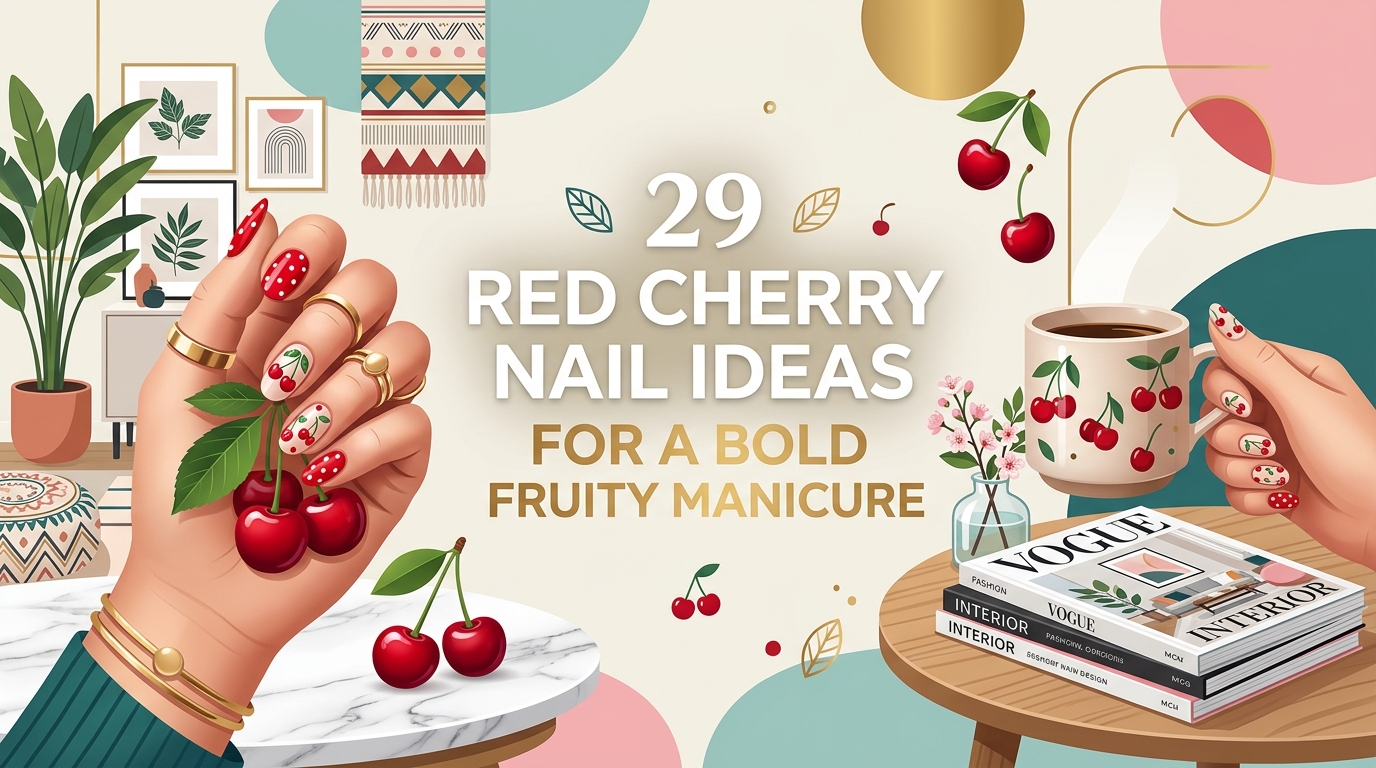
29 Red Cherry Nail Ideas for a Bold Fruity Manicure
Fruit nail art can look charming in photos, but it is easy for the finished design to feel crowded or overly playful. Large cherries may overwhelm short nails, while too many patterns can make the manicure difficult to match with your clothes. You may also want bold red color without covering every nail in solid polish.
These 29 red cherry nail ideas for a bold fruity manicure offer plenty of ways to balance bright fruit art with clean, wearable details. You will find sheer bases, French tips, gingham patterns, chrome finishes, short nail designs, and glossy statement sets. Some options use only one or two cherry accents, while others create a full summer theme.
Each idea includes practical application advice, color combinations, common mistakes to avoid, and a realistic price estimate. You can recreate simpler looks at home with a dotting tool and fine brush, or save the detailed sets for your next salon visit. Start with the designs that fit your normal nail length and outfit inspiration.
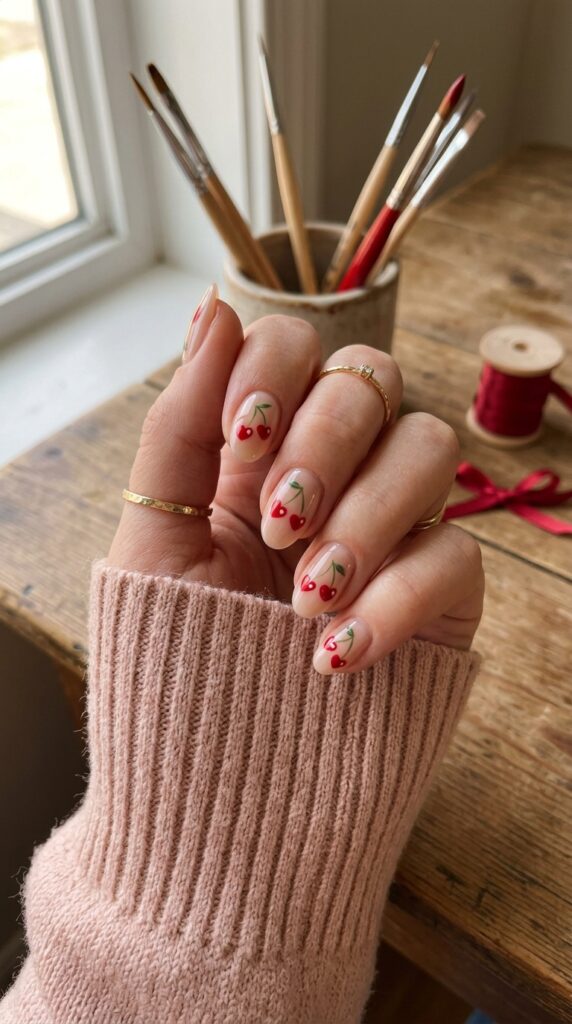
1. Classic Red Cherry Nail Ideas on a Sheer Base
A sheer pink base gives tiny red cherries a clean, glossy background. The translucent polish keeps the manicure light, while the fruit adds a vivid pop of color. This design looks lovely with white cotton shirts, pale denim, gold rings, and woven summer bags.
Apply two thin coats of sheer pink polish. Use a small dotting tool to create pairs of red circles, then connect them with curved green stems. Place cherries on two or three nails and leave the others plain. In my experience, the biggest mistake is making the fruit too large. Small cherries leave more open space and look neater. Home supplies usually cost $15 to $40, while a salon manicure may range from $50 to $90.
2. Glossy Red Nails With One Cherry Accent
Solid red nails create a bold background, while one cherry accent adds a playful detail. The manicure feels polished enough for dinners and events but still carries a cheerful fruit theme. It pairs well with black satin, white linen, denim, and simple gold jewelry.
Paint most nails with two thin coats of glossy cherry red. Use a pale pink or nude base on each ring finger, then add a small cherry pair. What I personally love about this design is the balance between strong color and delicate art. Avoid using two red shades that are almost identical, or the fruit may disappear. Choose a slightly deeper red for the cherries. Home products cost around $15 to $35, while salon pricing usually ranges from $45 to $85.
3. Red French Tips With Tiny Cherries
Red French tips bring clear color to the nail edge while leaving the base soft and natural. Small cherries near the cuticle create a second point of interest without covering the whole nail. The design works beautifully with almond, oval, and short square shapes.
Apply a sheer blush base, then use a fine brush to paint narrow red tips. Add one small cherry pair near the cuticle on two accent nails. Keep the fruit smaller than the width of the French line. A lot of people make both elements too large, which reduces the visible nail bed. Thin details create a cleaner result. Home supplies generally cost $18 to $45, while a salon design may range from $55 to $100.
4. Milky White Nails With Bright Cherry Art
Milky white polish gives red cherries a fresh, high contrast background. The creamy base feels softer than opaque white and looks clean beside summer dresses, light denim, silver rings, and straw accessories.
Use two thin coats of milky white, then paint small cherry pairs on selected nails. Add fine green stems and tiny leaves for extra detail. In my experience, the biggest mistake is using a thick white base that looks chalky. A slightly translucent formula makes the design feel lighter. Allow the background to dry fully before painting the fruit so the red stays crisp. Home materials cost $15 to $40, while a salon gel manicure may range from $50 to $95.
5. Black Cherry Nails With Burgundy Fruit
Deep black cherry polish creates a moody base for burgundy fruit details. The low contrast design feels rich and glossy rather than playful, making it suitable for evening outfits, cooler seasons, and darker fashion styling ideas.
Paint most nails with black cherry polish. Use a sheer nude base on two accent nails, then add burgundy cherries with dark green stems. Choose fruit color that is lighter than the solid nails so the art remains visible. A common mistake is using black outlines around every detail, which can make the fruit look heavy. Let the burgundy create its own definition. Home supplies cost around $18 to $45, while salon pricing may range from $55 to $100.
6. Cherry Gingham Picnic Nails
Red and white gingham creates a cheerful picnic background for small cherry art. Alternating patterned nails with solid red and pale pink keeps the set lively without feeling crowded. It pairs naturally with cotton dresses, woven baskets, sandals, and casual summer accessories.
Paint gingham on two nails using a white base and fine red lines. Add cherry pairs to two pale pink nails and use solid red on the remaining fingers. What I personally love about this set is how each design remains easy to see. Avoid adding gingham and cherries to every nail. Repeating fewer patterns creates better balance. Home art tools may cost $20 to $50, while a detailed salon set usually ranges from $65 to $115.
7. Short Nails With Single Cherry Pairs
Short rounded nails can carry cherry art beautifully when the design stays small. A sheer nude or soft pink base creates enough open space, while one fruit pair on each hand adds a clear summer detail.
File the nails into a soft oval or rounded square. Apply a translucent base, then place one cherry pair near the corner of each ring finger. Use a toothpick or tiny dotting tool for better control. In my experience, the biggest mistake is using a large dotting tool that covers most of the nail. Keep the fruit compact and the stems fine. Home products generally cost $12 to $35, while a short gel manicure with accents may range from $40 to $75.
8. Red Cherry Nail Ideas With Black French Tips
Black French tips give cherry nail art a sharper, more graphic look. The dark edge creates contrast against a nude base, while red fruit adds warmth. This manicure works well with leather jackets, black dresses, silver rings, and red accessories.
Apply a sheer beige base and paint thin black tips. Add cherries to two or three nails, placing the fruit slightly below the French line. Keep the stems green or black depending on the look you prefer. A lot of people use thick black tips, which can make the set feel heavy. Narrow lines leave room for the cherry details. Home supplies cost $18 to $45, while salon pricing usually ranges from $55 to $105.
9. Jelly Red Nails With Floating Cherries
Jelly red polish creates a translucent, glassy surface that gives cherry art extra depth. Small fruit designs can appear to float between layers, creating a juicy manicure that catches summer light beautifully.
Apply one coat of sheer red jelly polish, then paint a few small cherries. Add another light jelly layer and place extra fruit above it. This creates a layered effect without using bulky decorations. What I personally love about this technique is how the cherries appear at different depths. Avoid using opaque red polish, which removes the glassy finish. Home jelly products and tools cost around $20 to $50, while a salon set may range from $60 to $110.
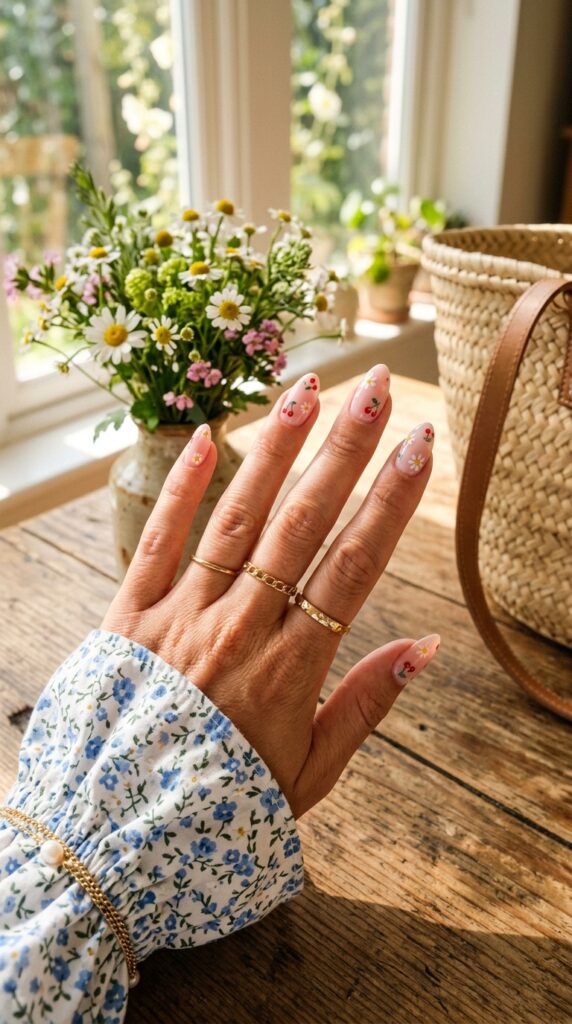
10. Cherry and Daisy Nail Art
White daisies soften bright red cherry accents and create a garden inspired manicure. A pale pink base keeps the two designs connected, while several plain nails prevent the set from becoming too busy.
Paint cherries on two nails and tiny daisies on another two. Use solid blush or sheer pink on the remaining fingers. A dotting tool can create both petals and fruit, making this design manageable at home. A common mistake is placing flowers and cherries together on every nail. Give each motif its own space. Fine stems and small petals look more balanced on short or medium nails. Home supplies cost $20 to $45, while salon nail art may range from $65 to $115.
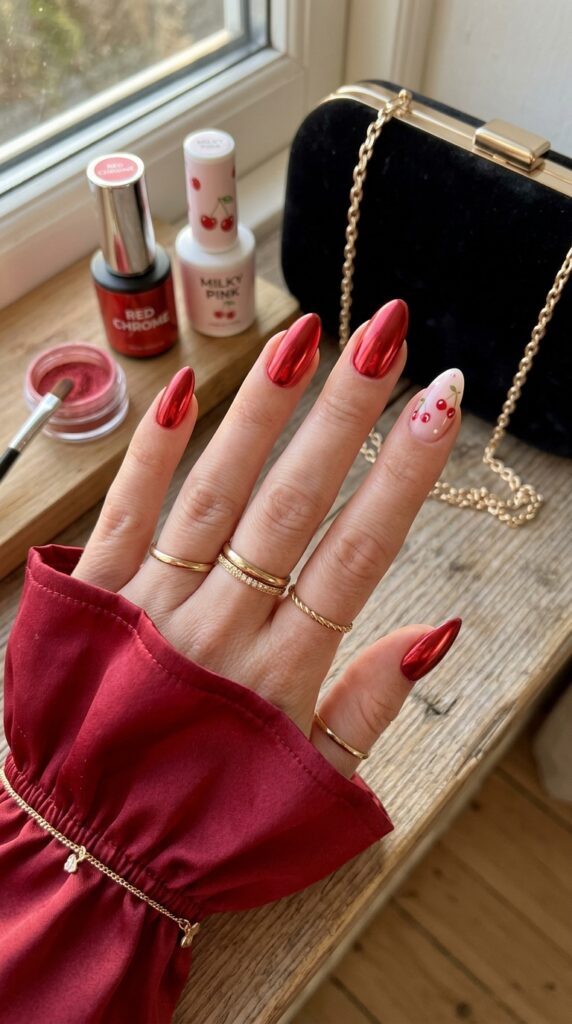
11. Red Chrome Nails With Cherry Accents
Red chrome creates a reflective base that shifts between ruby, crimson, and metallic pink. Small cherry details on nude accent nails keep the fruit visible while allowing the chrome to remain the main feature.
Apply red gel and chrome powder to most nails. Use milky pink polish on two accent fingers, then paint small cherries after sealing the base. In my experience, the biggest mistake is placing detailed art directly over loose chrome powder. Always seal the reflective layer before adding artwork. Keep the cherry accents simple because the chrome already provides plenty of shine. Salon sets usually cost between $65 and $120, while home gel and chrome supplies may cost $35 to $85.
12. Cherry Hearts on a Nude Base
Heart shaped cherries add a romantic detail to the traditional fruit design. The red hearts hang from curved green stems over a sheer nude or blush base, creating a manicure that feels sweet without using large decorations.
Use a dotting tool to place two red dots close together, then pull the polish downward with a fine brush to form a heart. Add slim stems once the fruit dries. What I personally love about this design is that the heart shape remains subtle from a distance. Avoid making the hearts too wide, especially on short nails. Practice the shape on paper before painting the manicure. Home tools cost $15 to $40, while salon art may range from $55 to $100.
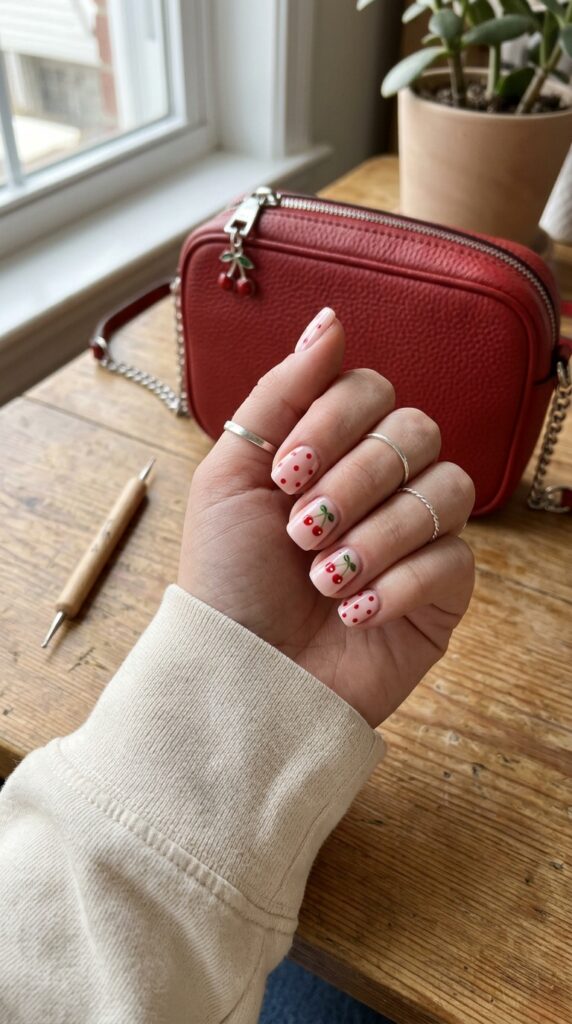
13. Red Polka Dots With Cherry Accents
Red polka dots create a playful background that connects naturally with cherry art. Using dots on two nails and fruit on two others keeps the set clear and balanced. A milky white or pale pink base works well with both details.
Apply the base color, then use the smallest dotting tool to create evenly spaced red dots. Add cherry pairs to separate accent nails. A lot of people place the dots too close together, making the pattern look crowded. Leave visible space between each mark. Use solid red polish on one or two fingers if you want stronger color. Home supplies generally cost $15 to $40, while salon pricing may range from $55 to $100.
14. Deep Red Ombré With Cherry Tips
A nude to deep red ombré creates a smooth background for small cherries near the tips. The gradual transition feels rich and glossy, while the fruit adds a clear theme without covering the blended color.
Use an airbrush or sponge to fade sheer nude into burgundy red. Paint tiny cherries slightly above the free edge so the art is less likely to chip. In my experience, the biggest mistake is making the red section too opaque and high, which leaves little visible ombré. Build the color slowly from the tip upward. A salon ombré design usually costs between $65 and $115, while home supplies may cost $25 to $60.
15. Cherry Bows and Red Ribbons
Tiny bows and cherry pairs create a coordinated red theme over pale pink polish. The curved ribbon shapes feel delicate, while the fruit keeps the manicure bright and playful. It pairs well with feminine outfit inspiration, satin tops, and ballet flats.
Paint bows on two nails and cherries on another two, leaving the remaining nails solid pink. Use a fine brush for the ribbon loops and a dotting tool for the fruit. A common mistake is making every design large and detailed. Keep both motifs small so the set remains balanced. Home art supplies cost around $18 to $45, while salon pricing may range from $60 to $110.
16. Bold Red Cherry Nail Ideas With Gold Details
Gold lines or tiny foil pieces add warmth to red cherry nail art. A sheer nude base keeps the manicure open, while fruit and metallic details create a richer finish for dinners, birthdays, or summer celebrations.
Paint cherries on selected nails, then add a fine gold curve near the cuticle or place small foil pieces beside the fruit. Limit the gold to two or three fingers. What I personally love about this set is how the metallic detail makes simple cherry art feel more polished. Avoid using large foil pieces, which can hide the fruit and catch on clothing. Salon designs generally cost $65 to $120, while home materials may cost $20 to $50.
17. Matte Nude Nails With Glossy Cherries
A matte nude base makes glossy red cherries stand out through texture rather than heavy color. The soft background feels modern, while the shiny fruit catches the light as the hands move.
Apply nude polish and seal it with matte top coat. Paint cherries afterward using glossy gel or polish, then add top coat only over the fruit. In my experience, the biggest mistake is applying glossy top coat across the whole nail at the end. This removes the texture contrast. Work carefully with a small brush and keep the cherry edges clean. Home products cost $18 to $45, while a salon matte art manicure may range from $55 to $105.
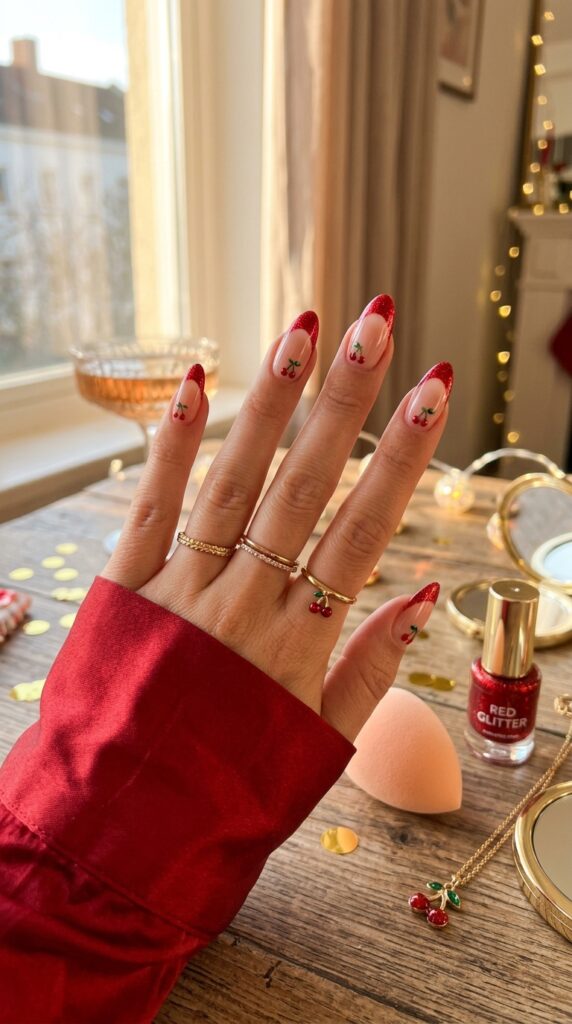
18. Red Glitter Tips With Cherry Art
Fine red glitter tips bring sparkle to a sheer pink manicure. Tiny cherry designs near the cuticles balance the reflective edge and create a lively look for parties, holidays, or warm evening events.
Apply a nude base, then use a sponge to press fine red glitter onto the tips. Fade the sparkle upward rather than creating a sharp line. Add cherries to two accent nails after sealing the glitter. A lot of people choose large glitter pieces that feel bulky and catch on fabric. Fine shimmer creates a smoother finish. Salon glitter cherry nails usually cost $60 to $110, while home supplies may range from $20 to $50.
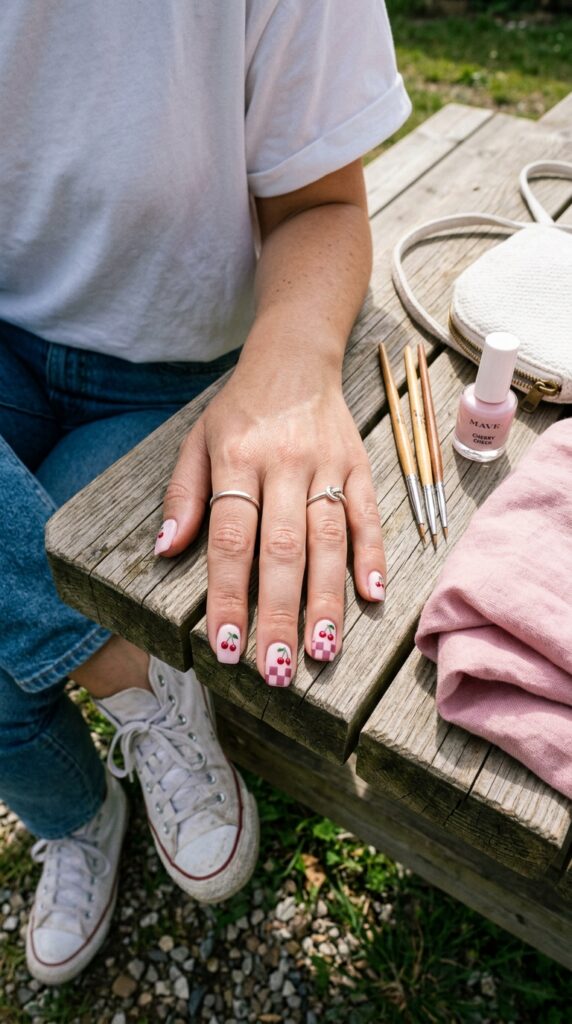
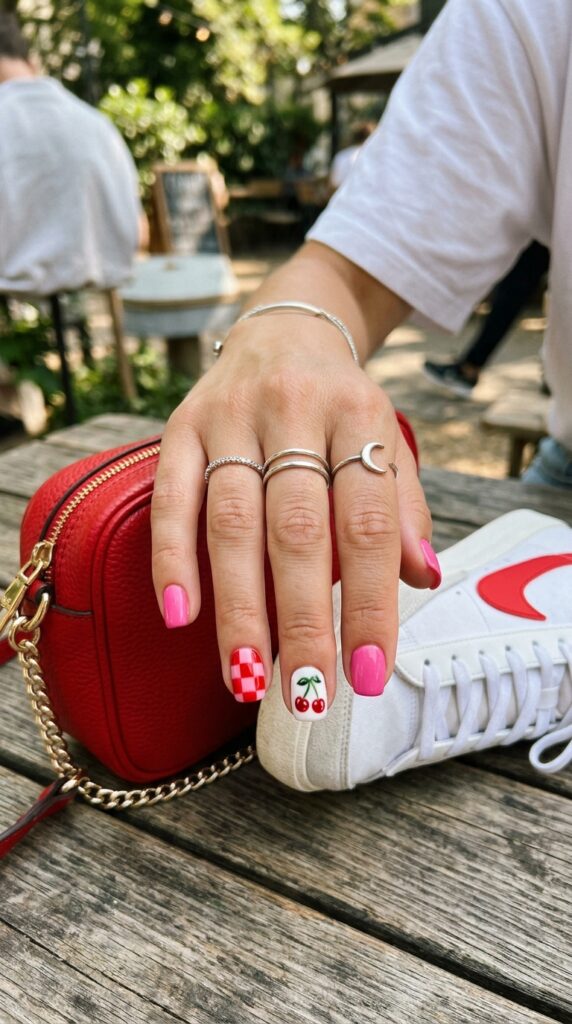
19. Checkerboard Cherries in Red and Pink
Red and pink checkerboard patterns create a graphic background for cherry accents. The close color palette keeps the design connected, while plain nails provide breathing room. This manicure works well with casual clothing, sneakers, and playful accessories.
Create four or six large checks on two nails using pale pink and red. Add cherry art to two separate nails and paint the rest solid pink. In my experience, the biggest mistake is painting too many small squares on short nails. Larger sections look cleaner and are easier to recreate. Use a liner brush or striping tape to guide the edges. Home tools cost $20 to $50, while a salon set may range from $65 to $115.
20. Realistic Cherries With White Highlights
Tiny white highlights make painted cherries look glossy and rounded. The fruit appears more realistic against a pale pink, nude, or milky white base, creating a detailed manicure without adding bulky decorations.
Paint each cherry with a deep red base, then add a smaller bright red area and one tiny white highlight. Use fine green stems and leaves to complete the artwork. What I personally love about this technique is how one small white mark adds dimension. Avoid placing the highlight in different directions on every cherry. Keep it consistent so the light source feels natural. Home supplies cost around $18 to $45, while detailed salon art may range from $65 to $120.
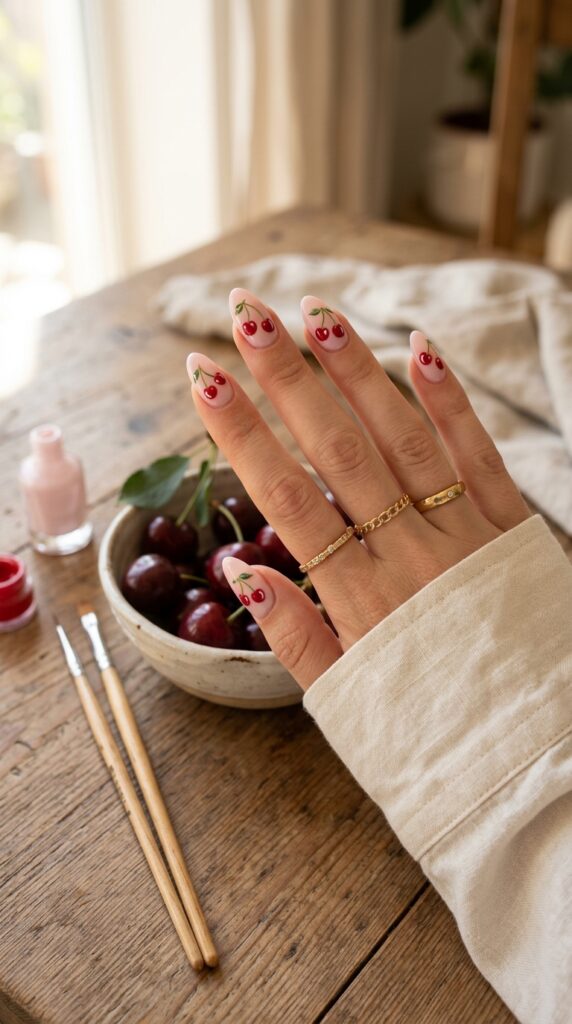
21. Cherry Cola Inspired Nails
Cherry cola nails combine deep red, brown, and glossy black cherry tones. Small fruit accents over a warm nude base connect the rich colors to the theme. The result feels moody and polished rather than bright.
Use espresso brown, burgundy, and black cherry across different nails. Add tiny cherries to one or two nude accents. Keep all finishes glossy to create a smooth cola inspired look. A lot of people use several unrelated reds, which can make the palette feel uneven. Choose shades with brown or wine undertones. Salon sets generally cost $60 to $115, while home polish collections may cost $25 to $60.
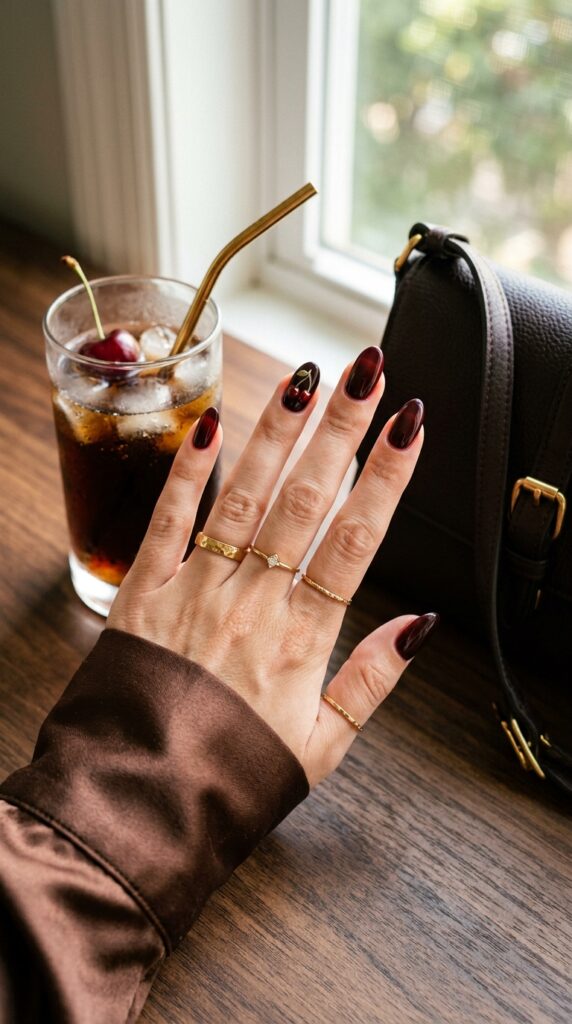
22. White French Tips With Cherry Clusters
White French tips create a crisp frame for clusters of red cherries. The design feels clean and cheerful, especially on almond or oval nails with a sheer blush base.
Paint narrow white tips, then add groups of two or three cherries to selected nails. Let one curved stem overlap the French line slightly for a natural layout. In my experience, the biggest mistake is placing clusters on every finger. Use them on two or three nails and leave the rest simple. Keep the tips thin enough to preserve the visible nail bed. Home supplies cost $20 to $45, while salon pricing may range from $55 to $105.
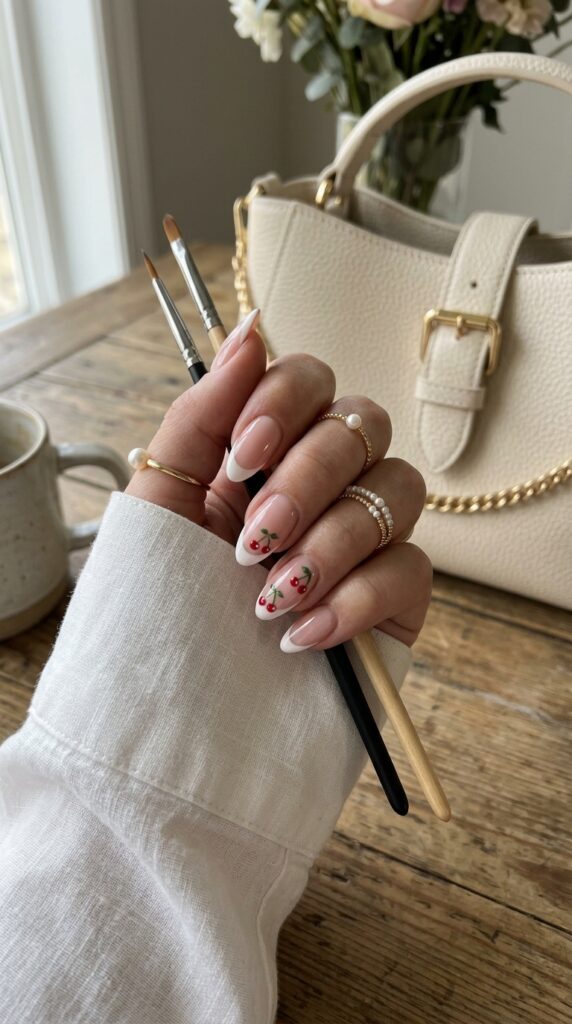
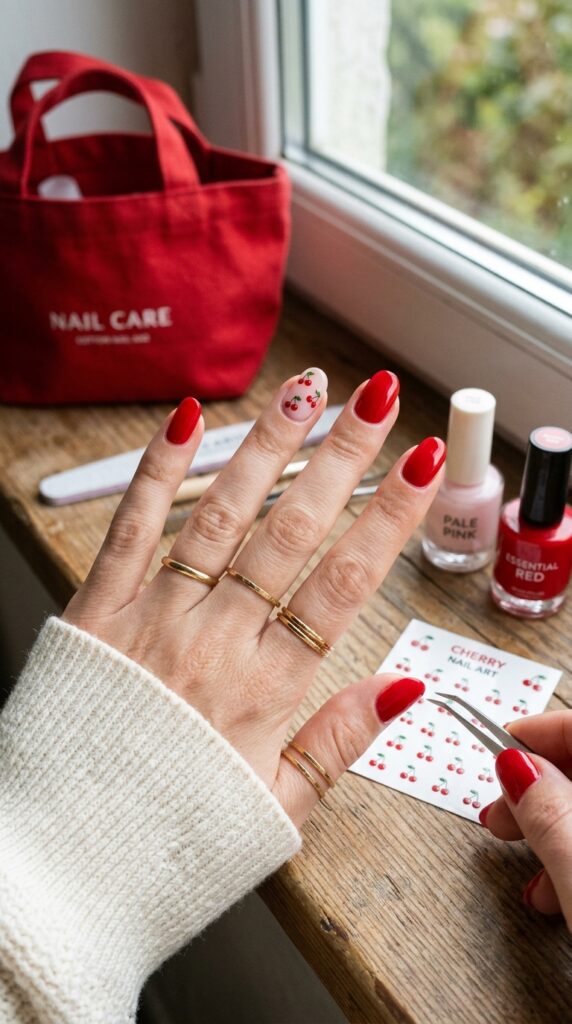
23. Cherry Nail Stickers on Glossy Red Polish
Cherry stickers offer an easier way to create detailed fruit art at home. When placed over a pale base beside glossy red nails, they can look neat and consistent without requiring advanced brush skills.
Paint most nails red and use nude or milky pink on the accent fingers. Apply small cherry decals with tweezers, press the edges flat, and cover them with two thin top coat layers. A common mistake is placing stickers over wet polish, which can cause wrinkling and movement. Let the base dry fully first. Decal sets and polish usually cost $12 to $35, while a salon manicure may range from $40 to $75.
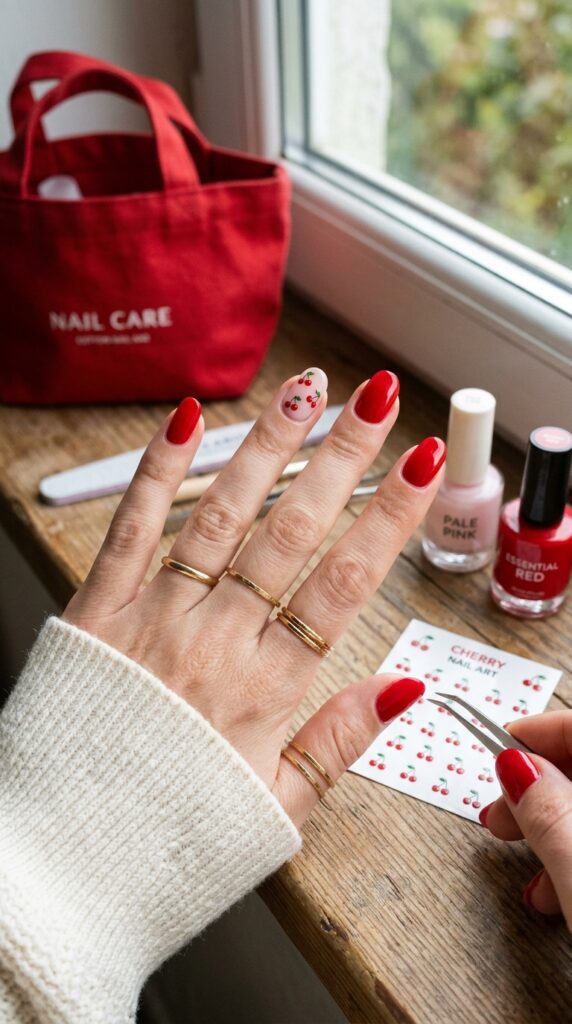
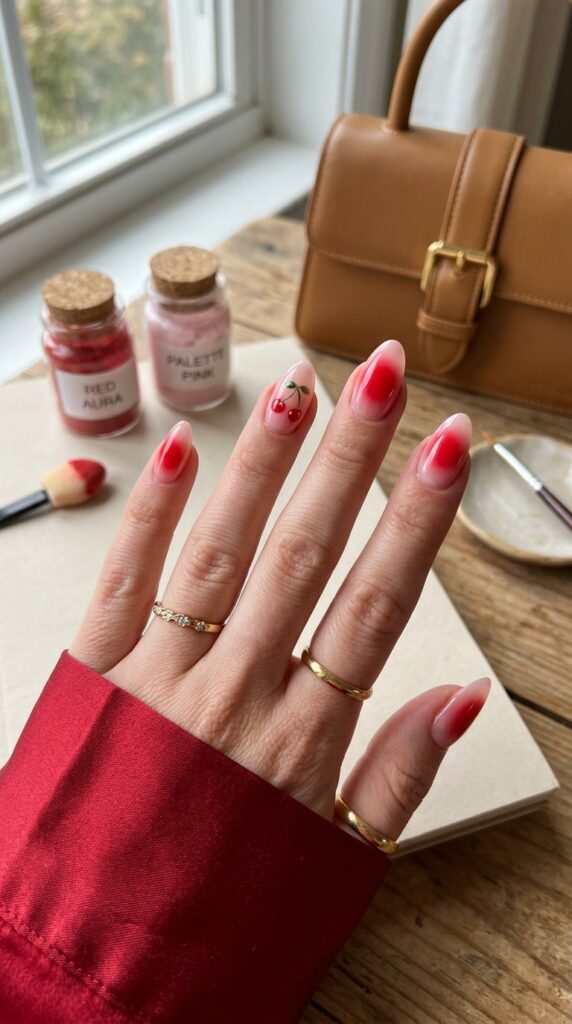
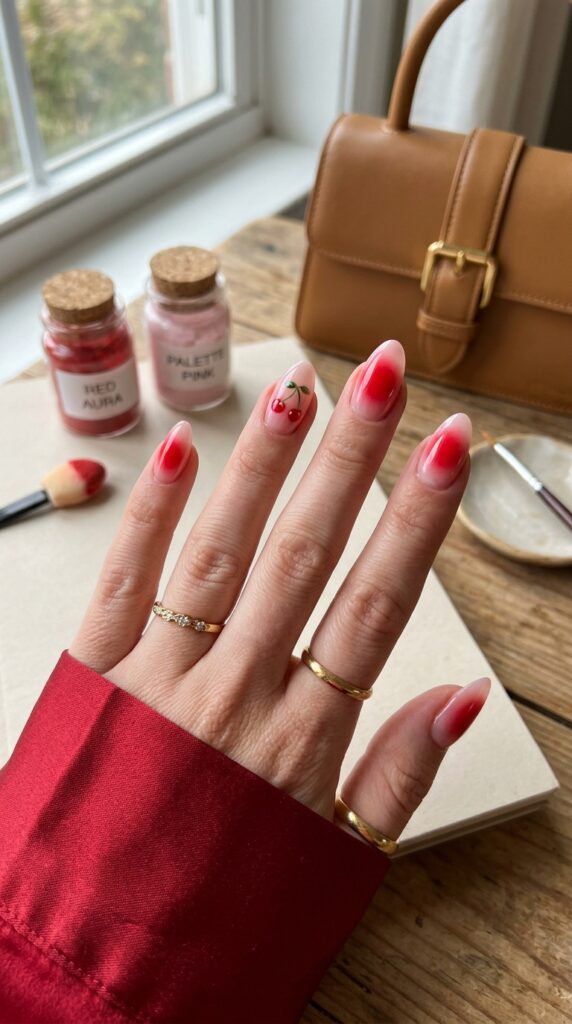
24. Red Aura Nails With Cherry Accents
A red aura manicure features a crimson center fading into pink or nude edges. Small cherries placed away from the darkest area add a playful detail without hiding the glowing background.
Create the aura first with an airbrush, sponge, or pigment applicator. Seal the design, then add cherries near one side of two accent nails. What I personally love about this combination is how the fruit echoes the center color. Avoid painting the cherries before blending the aura, since the pigment may blur the artwork. Build the glow gradually and leave a pale border. Salon aura cherry nails usually cost $70 to $125, while home supplies may range from $30 to $75.
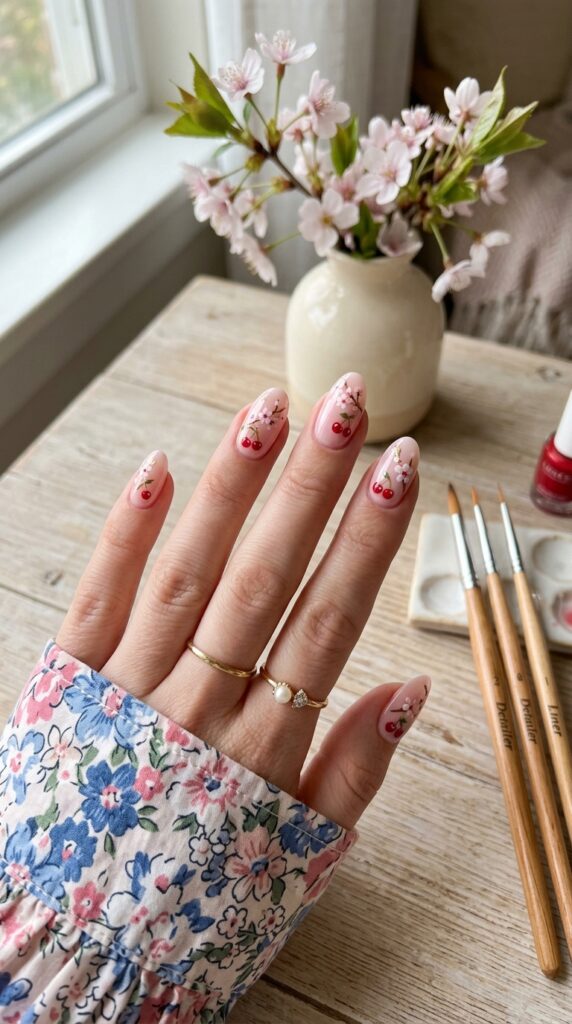
25. Cherry Flowers on a Soft Pink Base
Cherry blossoms and fruit can share one manicure when the details remain small. Pale flowers add softness, while red cherries bring stronger color. A light pink base helps both elements feel connected.
Paint blossoms on two nails and cherries on two others. Use solid pink polish on the remaining fingers. Keep the flower centers red or gold to repeat the palette. A lot of people add too many branches, petals, and fruit to each nail. Separate the designs so the artwork remains clear. Home art supplies cost $20 to $50, while salon pricing may range from $65 to $120.
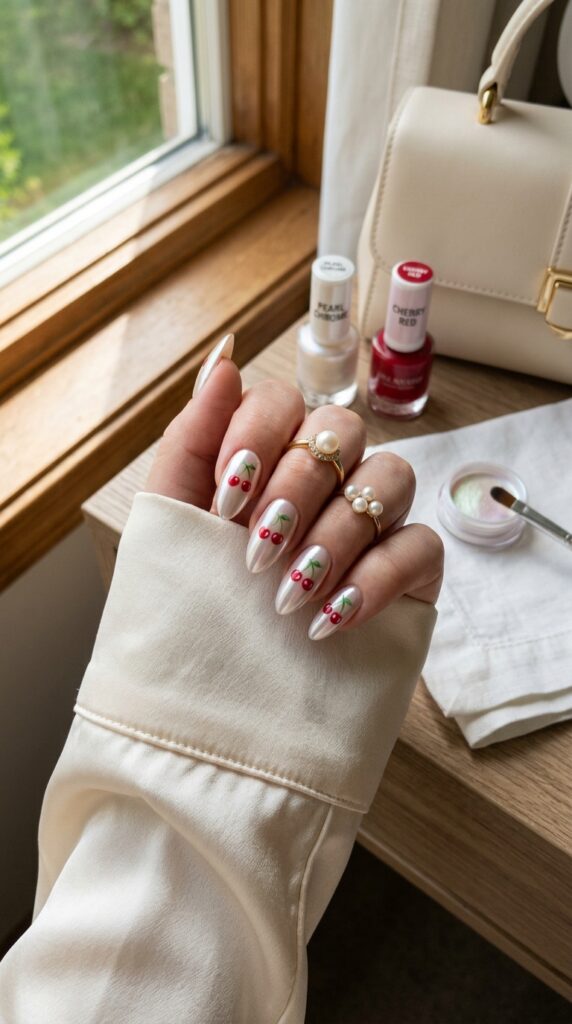
26. Red Cherries on Pearl Chrome
Pearl chrome gives a soft reflective background to bright red fruit. The ivory and blush shine changes under natural light, while the cherries remain crisp and easy to see.
Apply a milky pink gel base, rub in a light layer of pearl chrome, and seal it fully. Paint cherries on two or three nails, then add a final top coat over the artwork. In my experience, the biggest mistake is using a thick chrome layer that hides the base and makes the fruit less clear. A small amount of powder creates a smoother glow. Salon chrome art generally costs $65 to $120, while home gel supplies may cost $35 to $85.
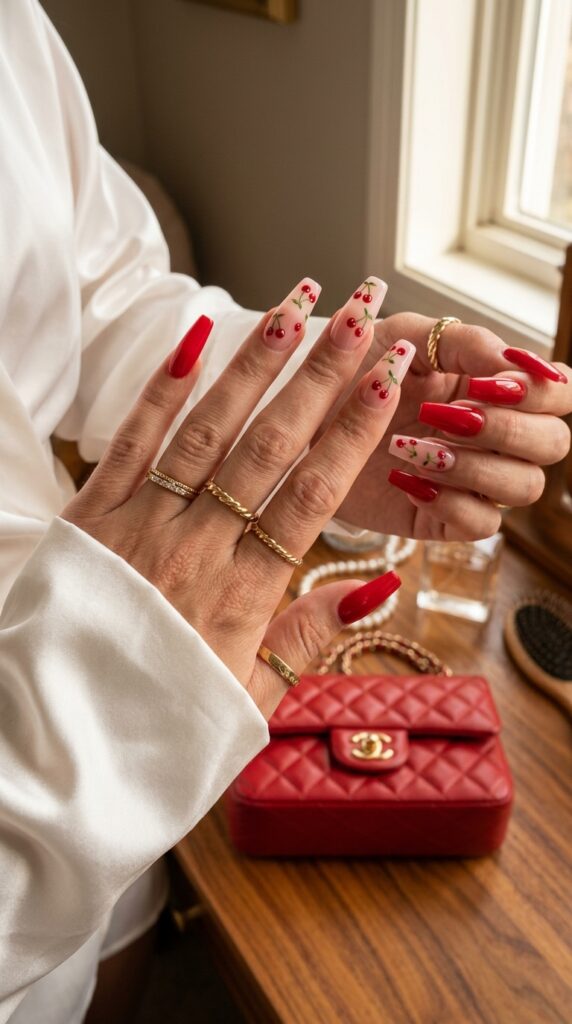
27. Long Coffin Nails With Cherry Clusters
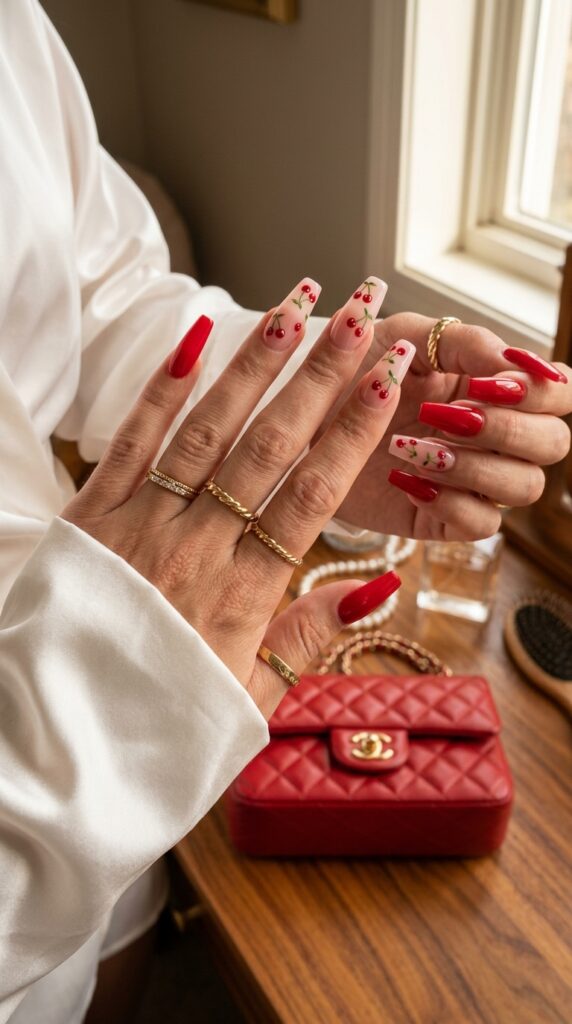
Long coffin nails provide enough space for detailed cherry clusters, curved stems, and tiny leaves. A sheer pink base keeps the artwork light, while solid red accent nails add stronger color.
Place cherry clusters on three or four nails and paint the remaining fingers glossy red. Keep the fruit concentrated near the center or tip so the long base remains visible. What I personally love about this design is how the artwork follows the tapered nail shape. Avoid filing the sidewalls too thin, since long coffin tips need enough strength for daily wear. A salon extension set may cost $70 to $135, while reusable press ons usually range from $25 to $60.
28. Minimal Red Line Art Cherries
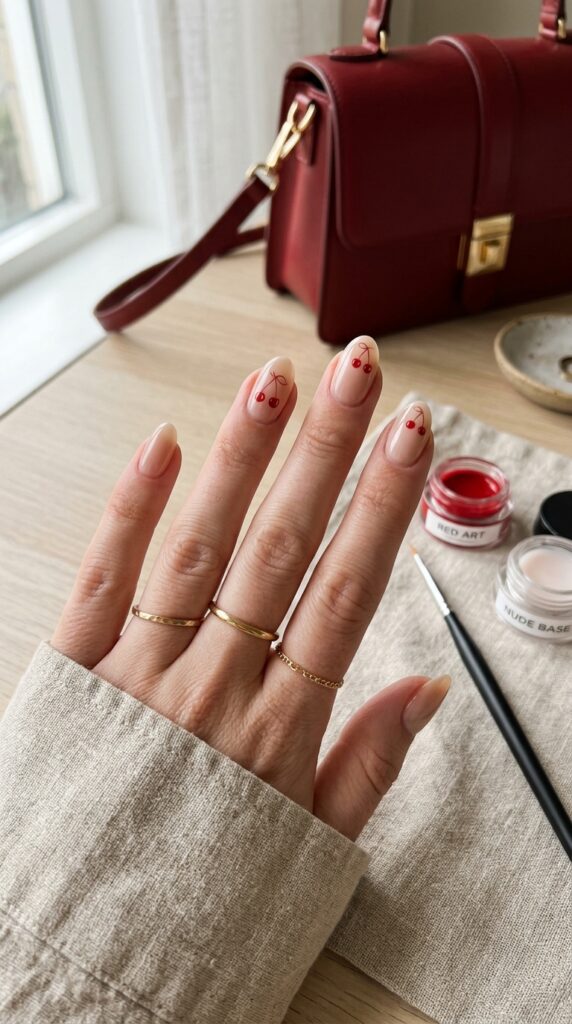
Fine red line art creates a modern version of cherry nails. Instead of fully filled fruit, thin outlines form the cherries and stems over a nude or milky base. The design feels light and graphic.
Use a long liner brush and red gel paint to draw two connected circles with curved stems. Keep the artwork on two or three nails and leave the others sheer. A common mistake is pressing too hard with the brush, which creates thick uneven lines. Use light pressure and turn the finger as you paint. Home tools cost $15 to $40, while salon line art may range from $50 to $95.
29. Mixed Red Cherry Nail Ideas for a Bold Fruity Manicure
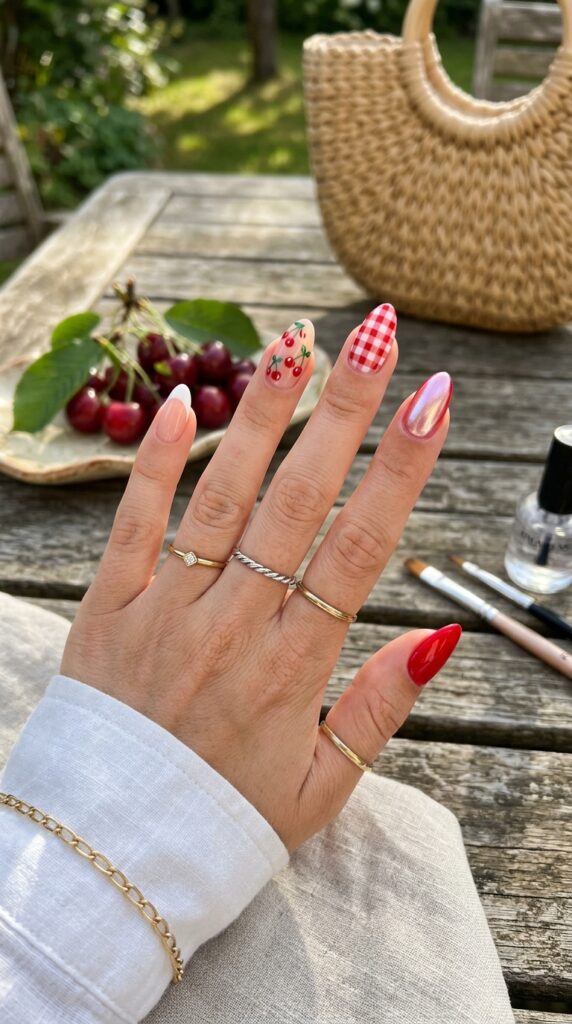
A mixed set combines glossy red polish, cherry art, French tips, gingham, and one reflective accent. Repeating red, white, and pale pink keeps the manicure connected while allowing each nail to feel different.
Plan the placement before starting. Use solid red on four nails, cherries on four, French tips on four, gingham on two, and pearl or red chrome on the remaining nails. I always recommend this when someone wants a custom manicure but cannot settle on one design. Avoid adding extra colors or large crystals, since the patterns already provide plenty of detail. Custom salon sets usually cost $75 to $140, while coordinated press ons may cost $25 to $65.
Choosing Cherry Nails That Match Your Style
Cherry nails can feel bright, romantic, graphic, or moody depending on the colors and patterns you choose. You do not need long extensions or fruit art on every finger to create a noticeable manicure. A single cherry pair over sheer pink polish can feel just as stylish as a detailed custom set.
These 29 red cherry nail ideas for a bold fruity manicure include short natural nails, French tips, chrome, gingham, glitter, aura designs, and deeper cherry cola shades. Start with one or two ideas that fit the colors already found in your wardrobe. A simple sheer base works well for everyday wear, while red chrome or mixed patterns bring more drama to a celebration.
You can recreate many designs with a small dotting tool, fine brush, red polish, and green polish. Take your time with the size and placement. Clean, compact fruit usually looks more polished than oversized artwork.
Which red cherry nail idea would you try first? I’d love to hear what you’re planning.
Frequently Asked Questions
Can red cherry nail art work on short nails?
Yes. Use tiny cherry pairs, a single accent nail, or small corner designs. A sheer or pale base leaves more visible space and prevents the fruit from overwhelming the short nail surface.
How do I paint cherries at home?
Place two small red dots close together with a dotting tool. Add curved stems using a fine liner brush and finish with a tiny green leaf or white highlight. Let each layer dry before applying top coat.
Which base colors suit red cherry nails?
Sheer pink, milky white, nude, blush, pale blue, black, and soft chrome all work well. Light bases create clear contrast, while darker shades produce a moodier result. Choose a background that keeps the red fruit visible.
How long do cherry gel nails last?
A gel manicure usually lasts around two to three weeks. The wear time depends on nail preparation, growth, and daily activity. Apply cuticle oil regularly and avoid peeling the gel from the natural nails.
Can cherries be combined with other nail designs?
Yes. Cherries pair well with French tips, gingham, polka dots, flowers, bows, chrome, glitter, and aura effects. Limit the manicure to two or three patterns and repeat the same colors to keep the set balanced.